The Question:
I am new to Apptivo and interested in using the Online Invoicing App. I’m a total newbie, so what information do I need to create an Invoice? Any steps to go through before I get started?
The Answer:
First off, if you haven’t yet, take a look at the Invoices Quick Start Guide and Invoice App documentation.
Once you have gone through configuration, you are ready to start creating invoices.
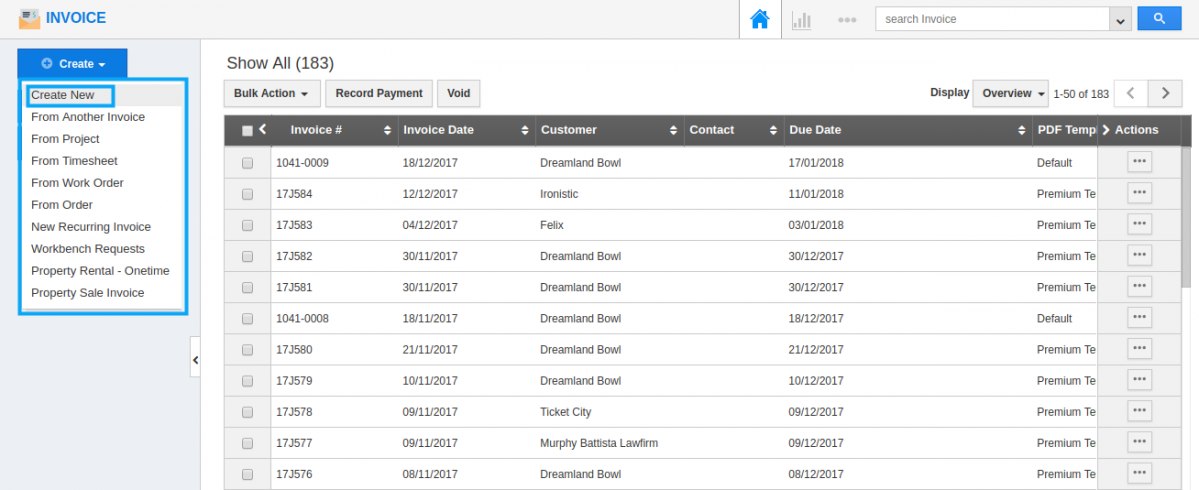
You have the ability to create an Invoice from scratch, or you can create from another invoice, From timesheet, From project, From Workorder, From Order, From New recurring invoice, Workbench requests, Property Rental-onetime, Property sales invoice.
For this example, let’s start off with the most basic method, creating a quick invoice:
- Log in, and move on to the Invoices App from Financials Category.
- Click on the “Create -> Create New” button in the upper left corner
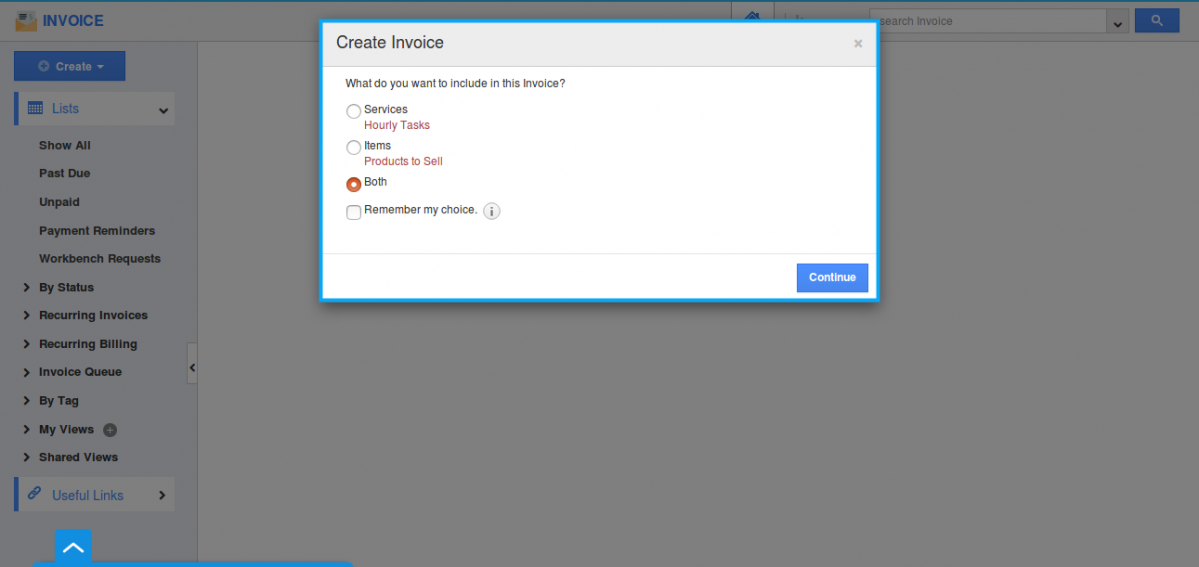
- You will be opened with “Create Invoice” popup where you can select on what to include in this invoice, whether for products sold, or for services rendered, or if your invoice will include both.
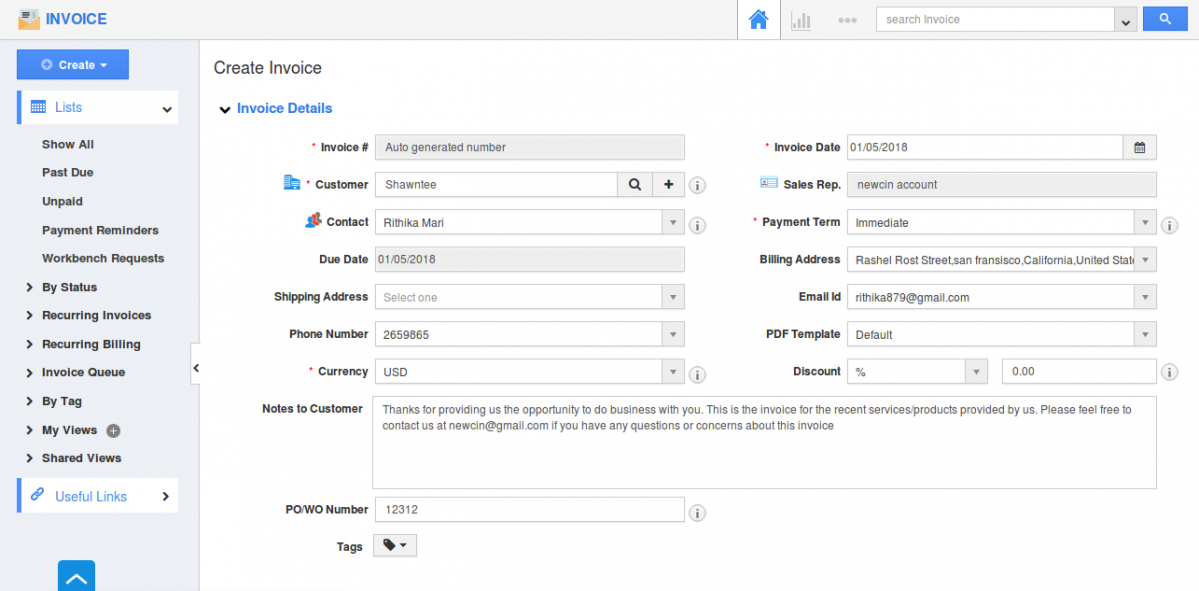
- Now we will fill in the basic invoice information.
- Invoice Number and invoice date will be autogenerated when you create a new invoice. Select the date of the invoice, which will typically be today’s date unless you are future or postdating the invoice.
- Search for a particular customer or you can add a new customer by clicking on the “+” icon. And selecting the customer, the customer’s billing address, shipping address, phone and Email id will be auto-populated.
- You can select your contacts associated with the customer from the drop-down. Payment term can be changed according to your need. It can be immediate or either within 30 days, 45 days, 60 days.
- You can provide with your own discount rate either as fixed rate or in percentage(%). Fill out your description about the invoices in “Notes to Customer” field.
- You can now add a reference to either the purchase order number or the number for a service work order. Tags are added to show difference in invoice created.
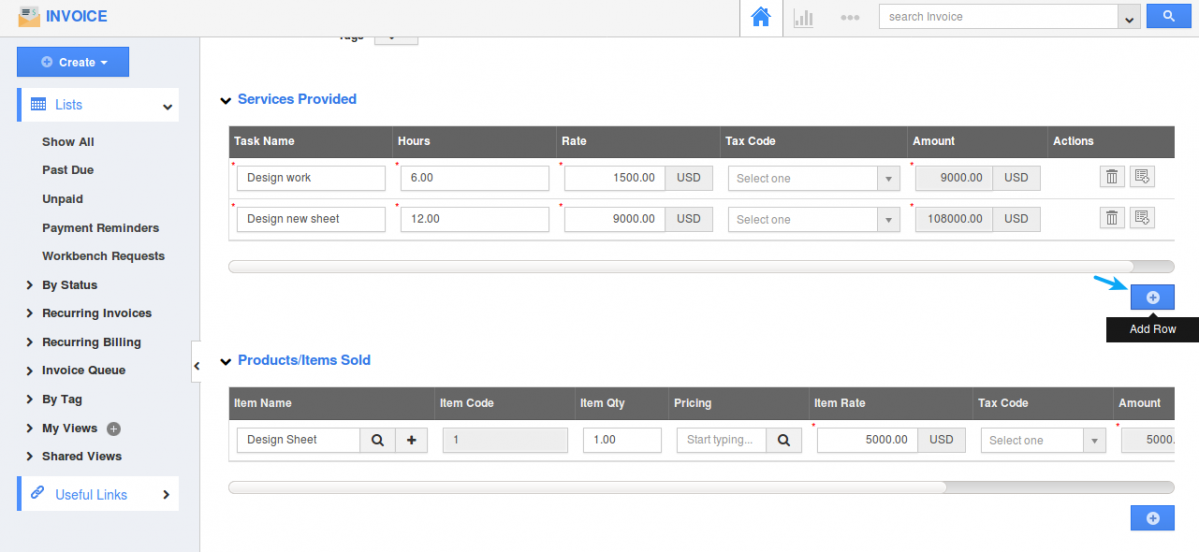
- Now we are ready to start adding the services we will be billing for.
- For services, write down a task name, enter the number of hours spent on the task, and how many dollars per hour you will be billing. Lastly, if you need to charge any taxes for this service, select the proper tax code.
- If you are billing for more than 1 task, click the “Add Tasks” button to create another line.
- If you are billing items, the process is slightly different.
- Instead of entering in the products, we will select products stored in the Items App. If the item does not exist yet, you can click the “+” button to create a new item. The Amount and Rate will be automatically calculated, simply enter the quantity of product, and the tax code that applies.
- Once again, you can add multiple items by clicking the “Add Items” button.
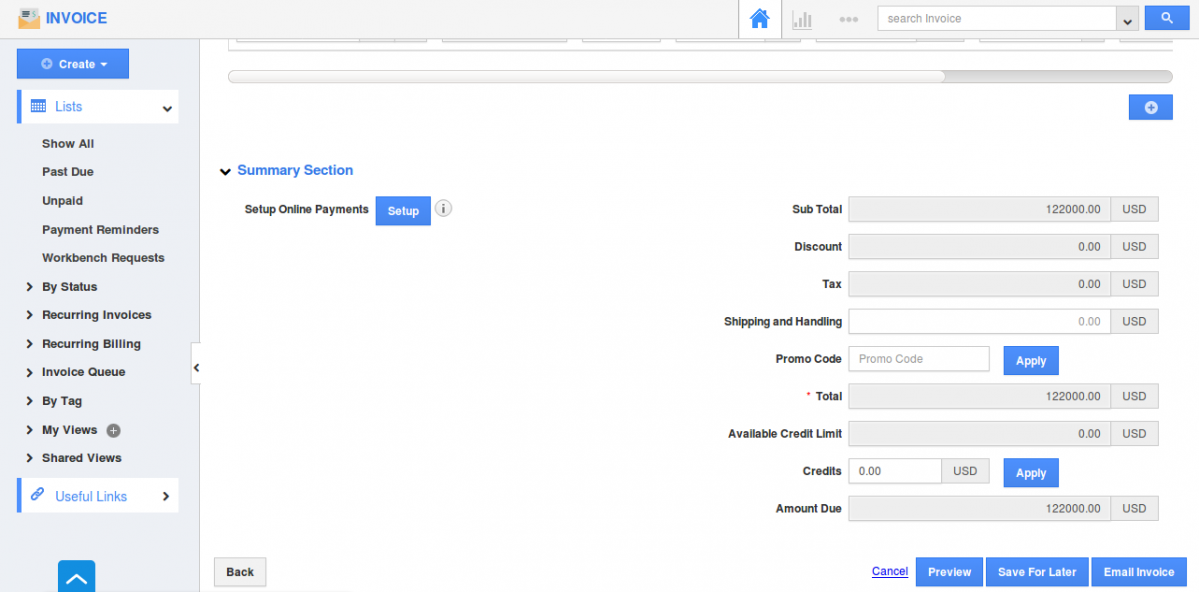
- Now we’re all done. You’ll notice all values are automatically calculated at the summary section.
- The next step is up to you. Either save this invoice for later if you wish to manually print and deliver the invoice; or you can email this invoice directly to your customer, and allow them to pay instantly online.
Next Steps
Back to Getting Started page
Latest Blogs
Apptivo's Integration with Amazon SES for Outgoing Email Server
Amazon Simple Email Service (SES) is an email platform that provides an easy, cost-effective way to send and receive email using your email addresses and domains. Apptivo has migrated its email service to Amazon SES (Simple Email Service) to enhance the performance and reliability of our email services
Read more →
EXPLORING MULTI CHANNEL CUSTOMER SUPPORT SOFTWARE
1.What is customer service software? 2
Read more →
Maximize your business performance with seamless CRM Integration
1.What is CRM Integration? 2
Read more →