We at Apptivo are happy to announce that a huge list of features have been deployed in the last release on March 12, 2018 which are much worth to the point. The following are the list of new features which have been deployed on this release.
Windows update
CRM
- 360 degree view
- Duplication Rules
- Homepage for Calendar
- Homepage for Follow ups
- Homepage for Call logs
- Homepage for Tasks
- Homepage for Notes
- Highlight Opportunities
- Multi select Drop down
- Highlight Call logs, Tasks and Events
- Counter Attribute in Opportunities App
- Sort Records based on Mobile List layout
- Entry and Exit criteria in Opportunities App
- Record the Loss Reason for Opportunities
- Create custom calculations using Functional Attributes
- Added Created On and Modified On in the Advanced Search
Windows update
CRM
- 360 Degree View – In this windows release, We have added a new feature of “360 Degree View” function for the CRM Apps(Customers, Contacts, leads and Opportunities). Using this, you can add or create other object records from any desired app. You can view 360 degree from the overview page of any object.
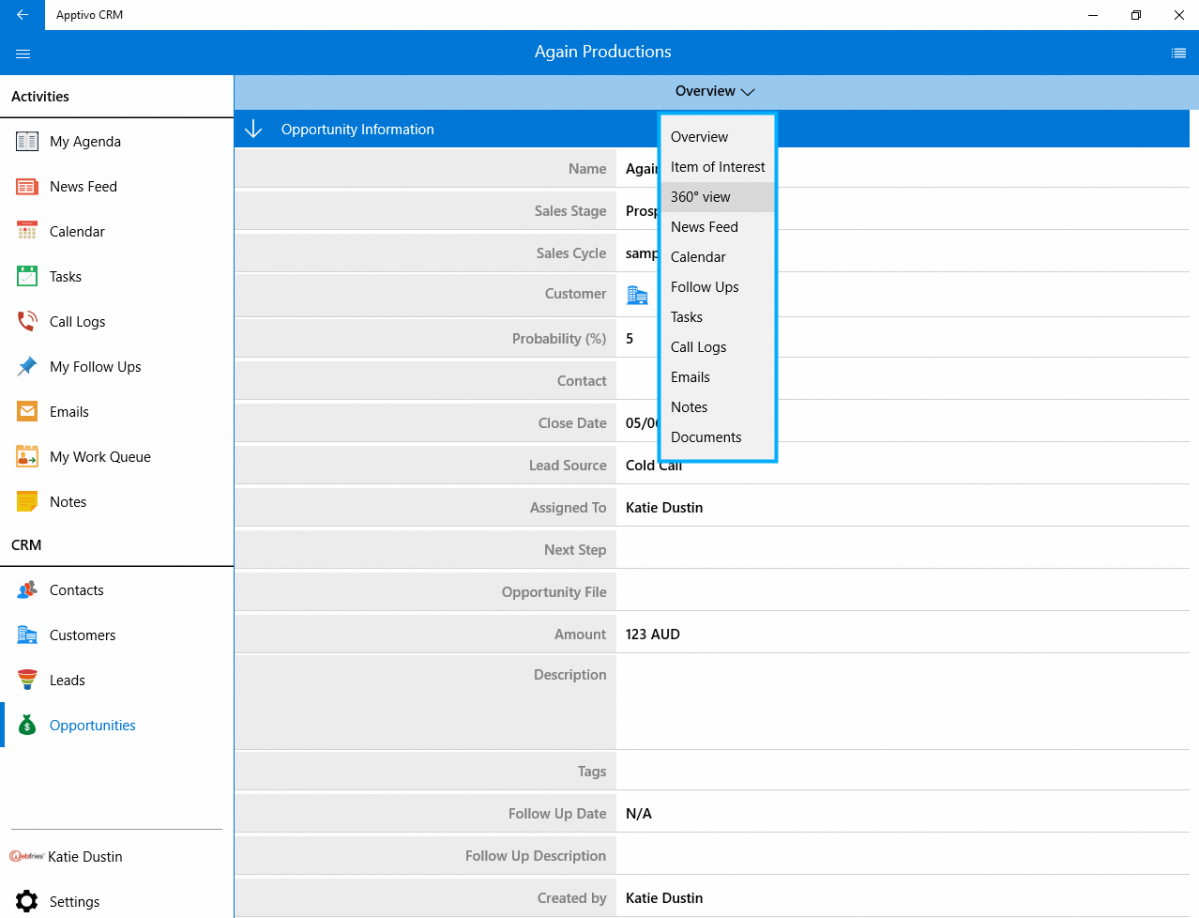
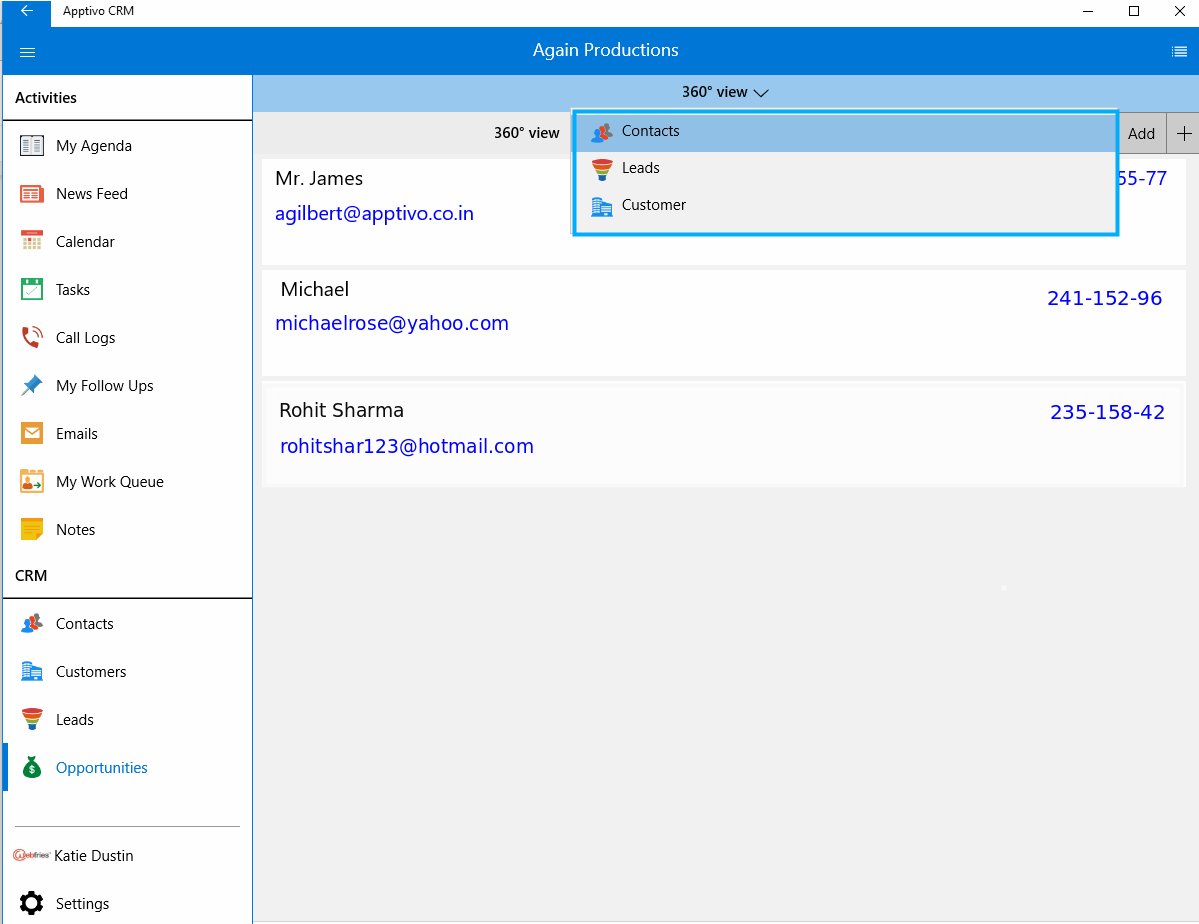
For instance – Move on to Opportunities App and select any Opportunity. You will be opened with Overview page. Select 360 degree view from the Overview drop down. By this you will be moved to 360 degree view page with other CRM apps(Customers, Contacts, Leads). You can create or add your object for that particular opportunity.
- Duplication Rule – We have added the Duplication Rule to our CRM apps like Contacts, Customers and Leads. Enabling the Duplicate Rule in web gets reflected in the Windows. It helps you to check for Duplicates when creating new objects and displays you the duplicated objects as a pop up in your creation page. Let’s move on to Customers App.
There are two actions.
- Prevent Duplication
- Warn and Flag duplication for review
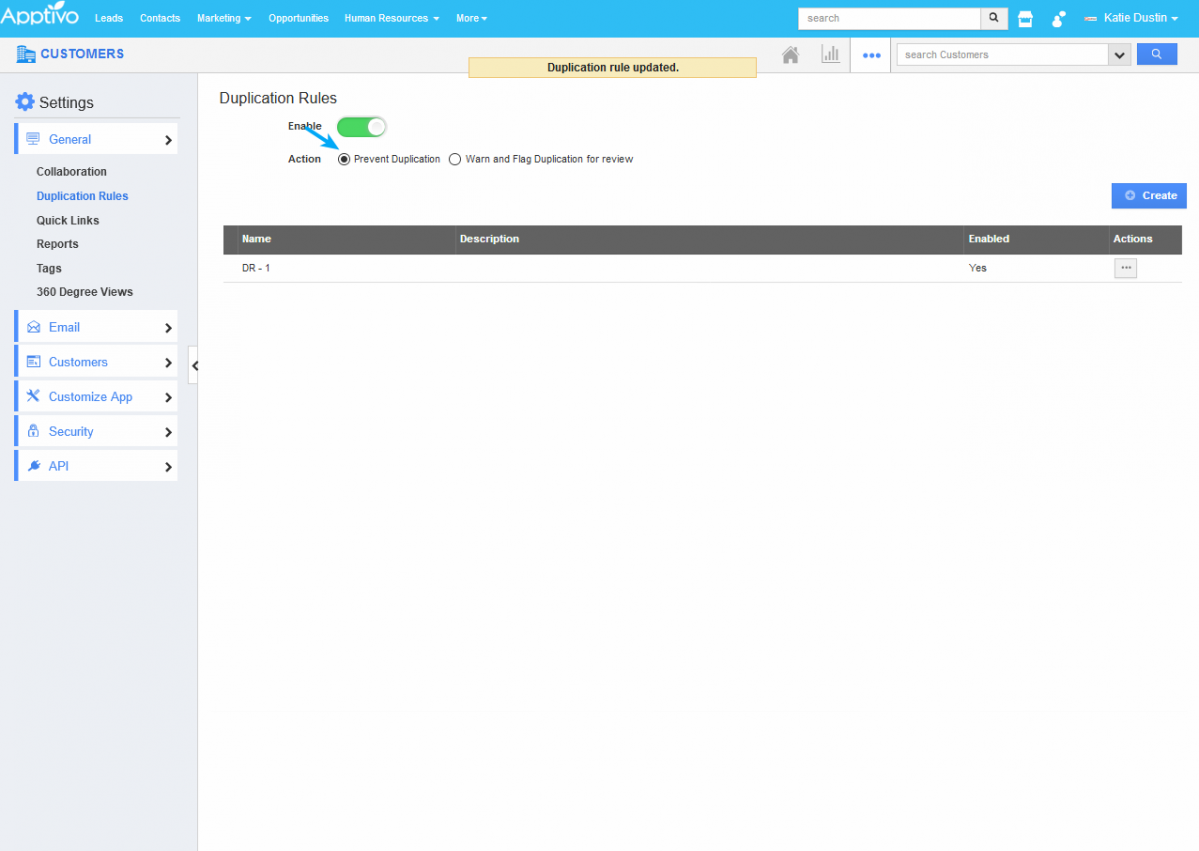
“Prevent Duplication” radio button is enabled in Web which gets reflected in Windows.
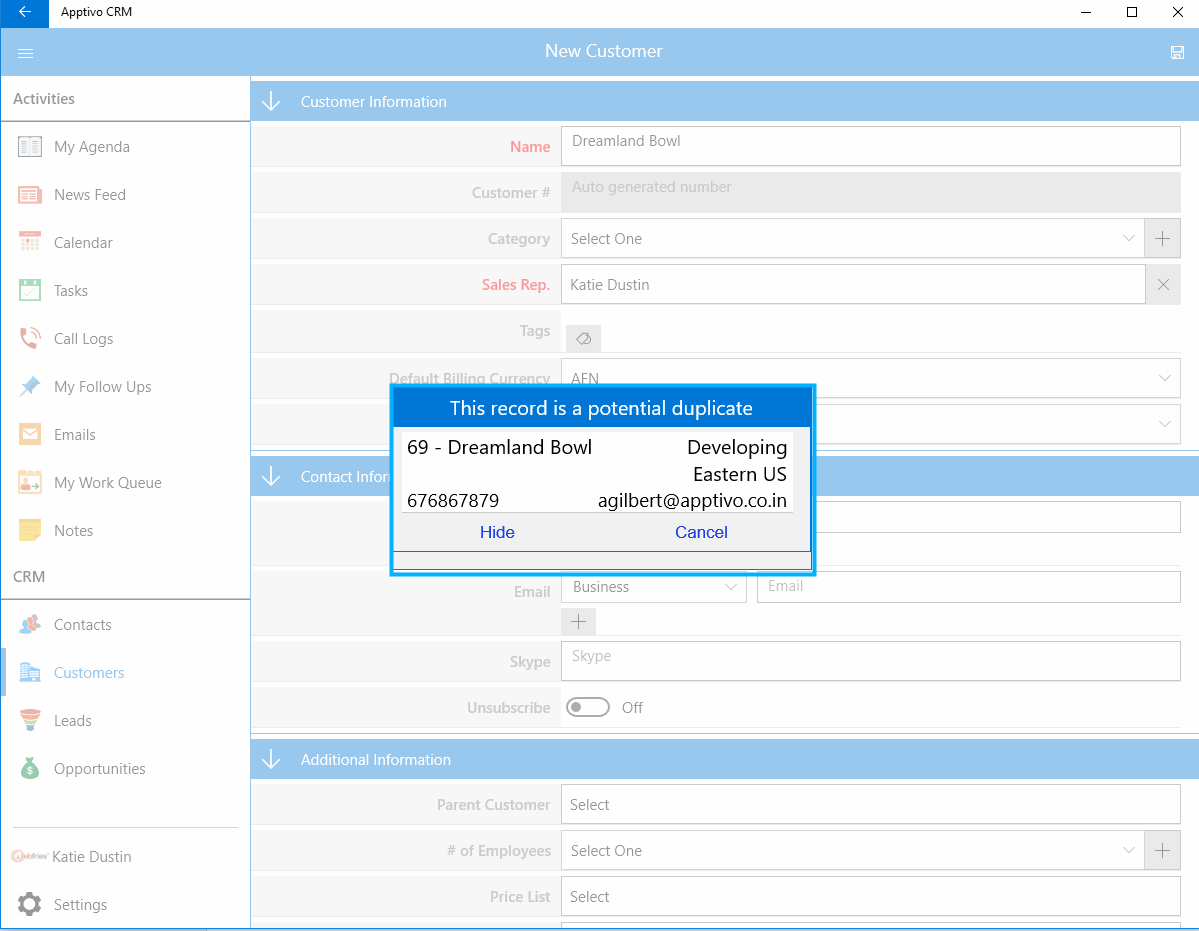
When “Prevent Duplication” is enabled, it (in Windows) helps you to check for the Duplicate when creating new objects and displays you the duplicated object as a pop up in your creation page. You can hide and change the information of the object.
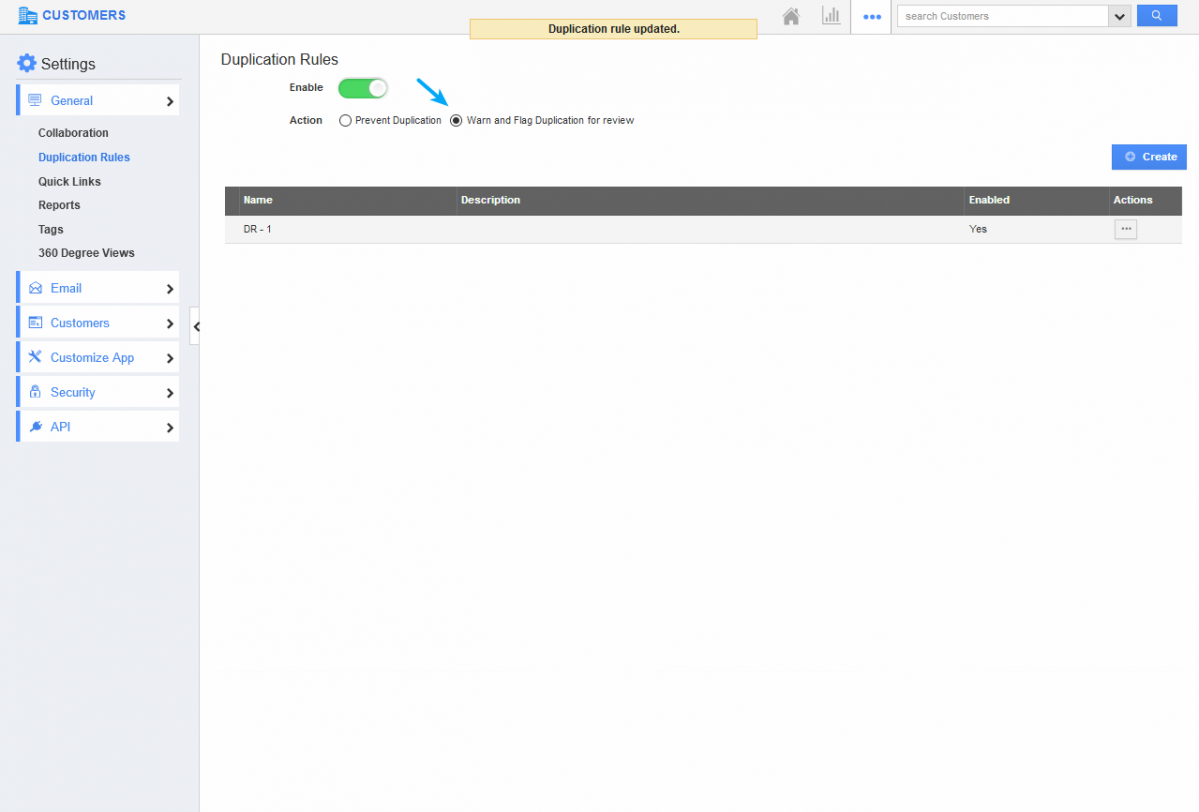
“Warn and Flag Duplication for Review” toggle button is enabled in web.
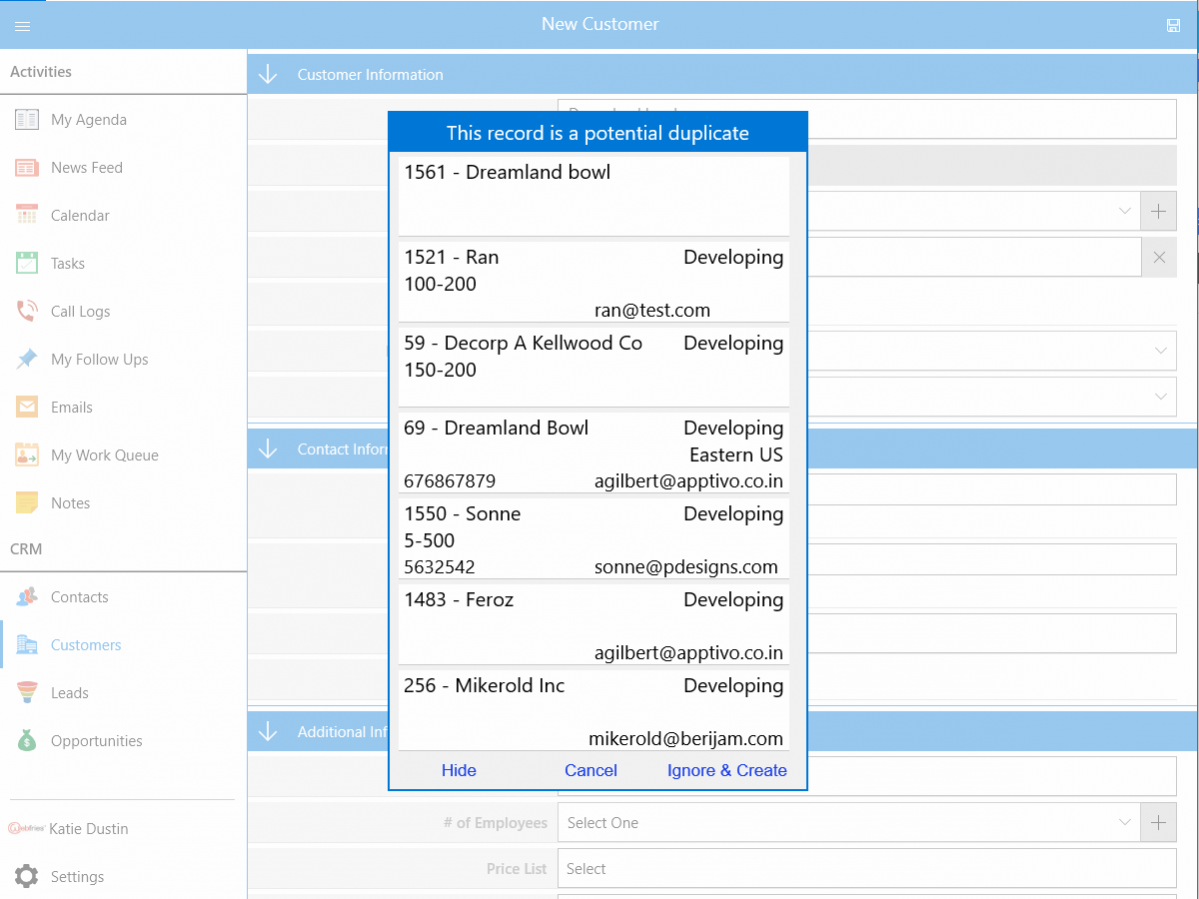
When “Warn and Flag Duplication for Review” is enabled, it (in Windows) helps you to check for duplicates when creating a new object and displays you the duplicated object as a pop up in your creation page.You can either change the information or ignore the Duplication and create a new object by clicking on “Ignore and Create”.
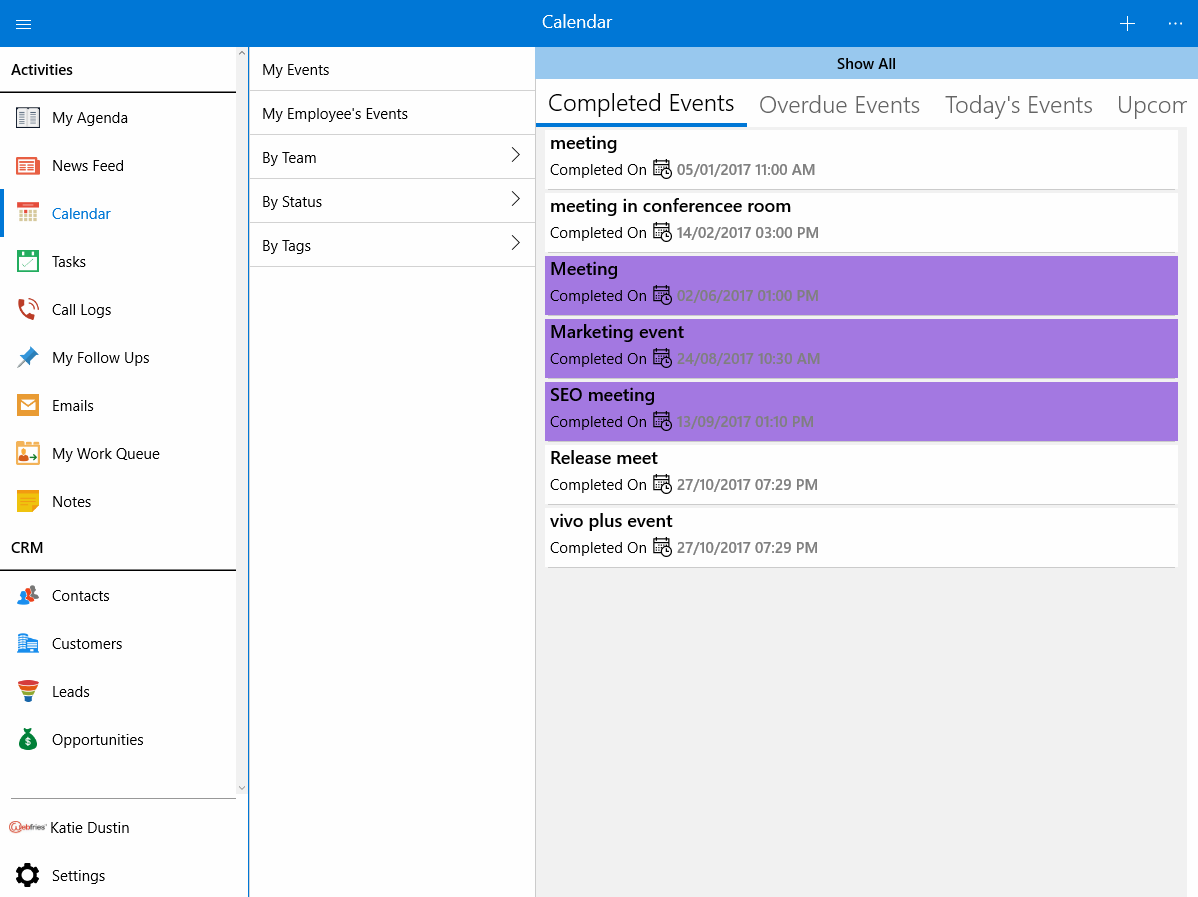
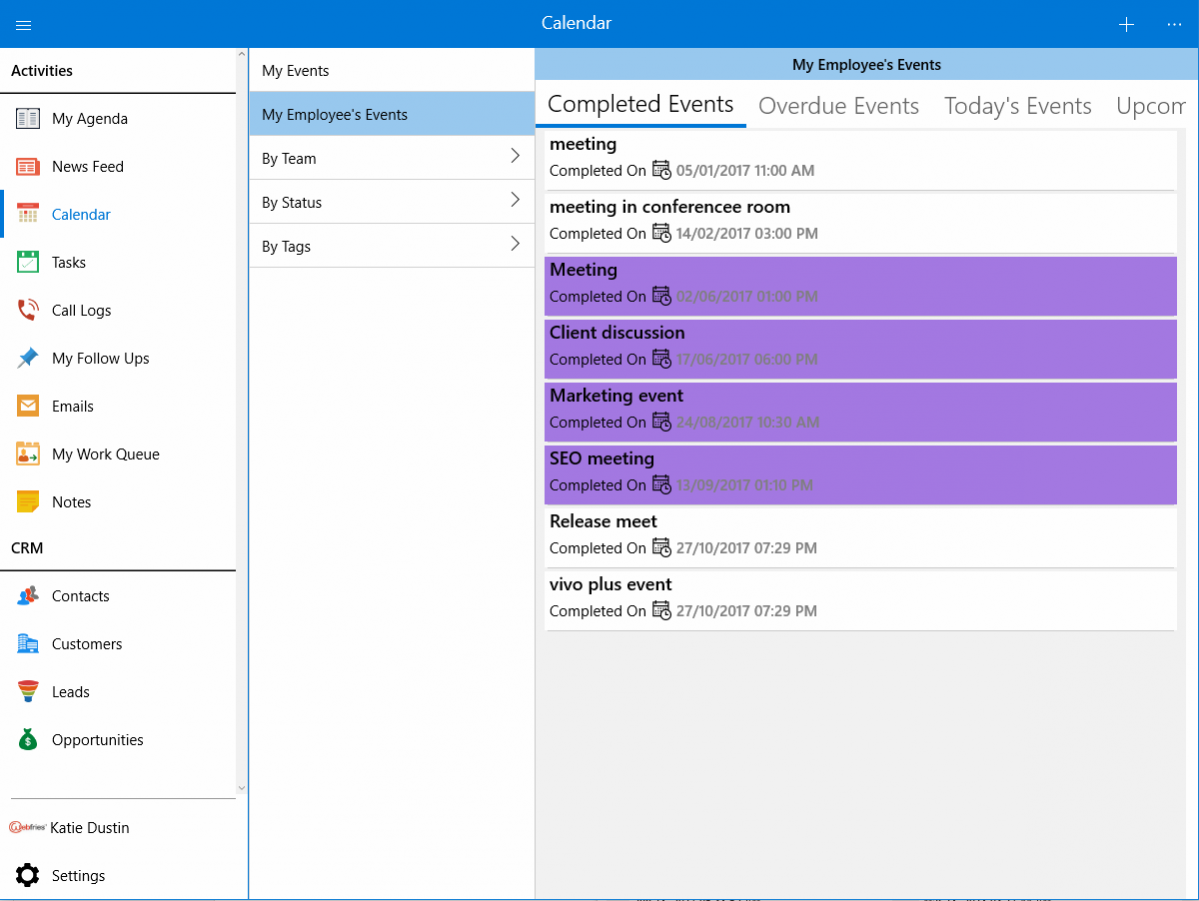
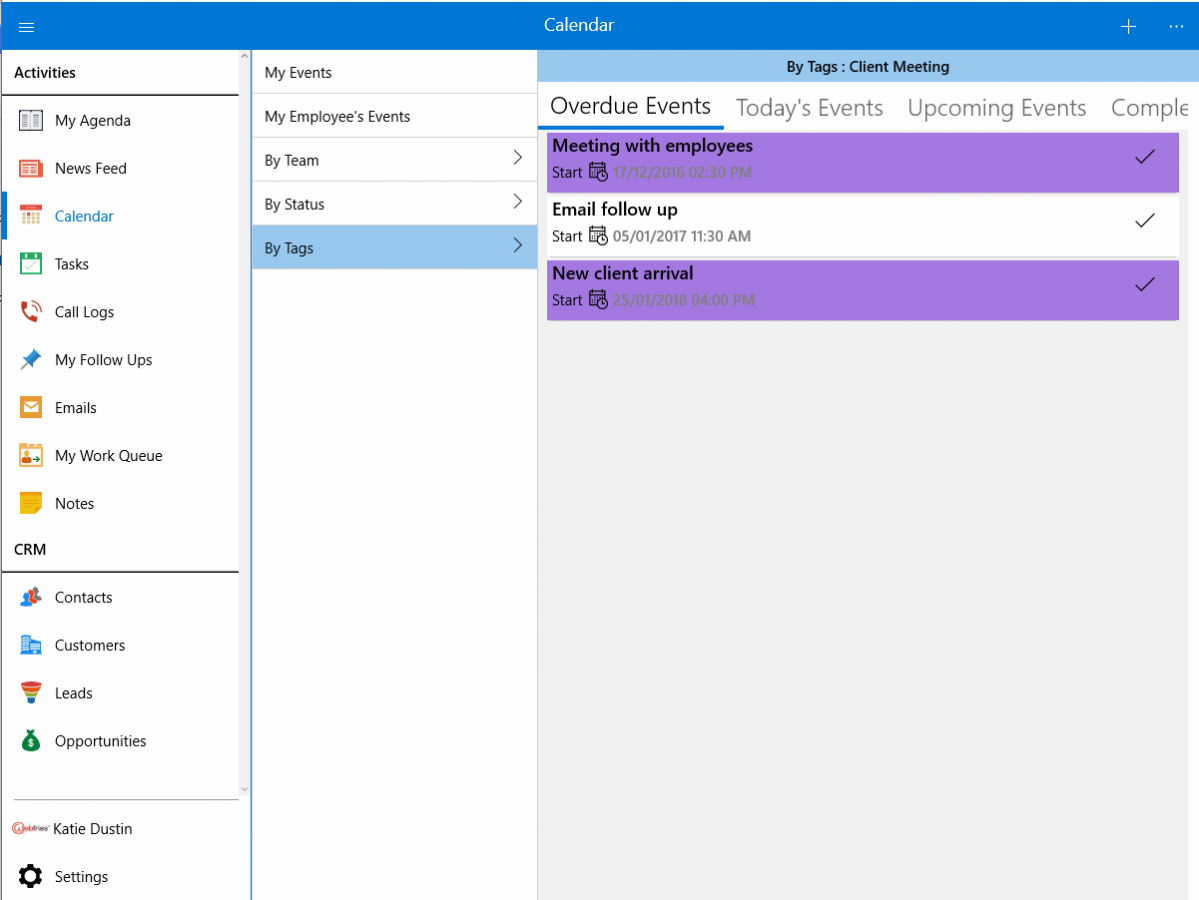
- Homepage for Calendar – In Windows (Mobile/Desktop), Apptivo CRM provides you with a separate homepage for Calendar. On selecting Calendar from Activities menu, you will be opened with the Calendar homepage. Clicking on the “+” icon helps you to create a new event. You can also view “My Events”, “My Employee Events”, “By Team”, “By Status” and “By Tags”. On selecting any of the fields, you will be directed to its page listing out its events.
Searching for events is done by both simple and advanced search. Advanced Search allows you to search for events using multiple fields whereas Simple search allows you to search with a single field.
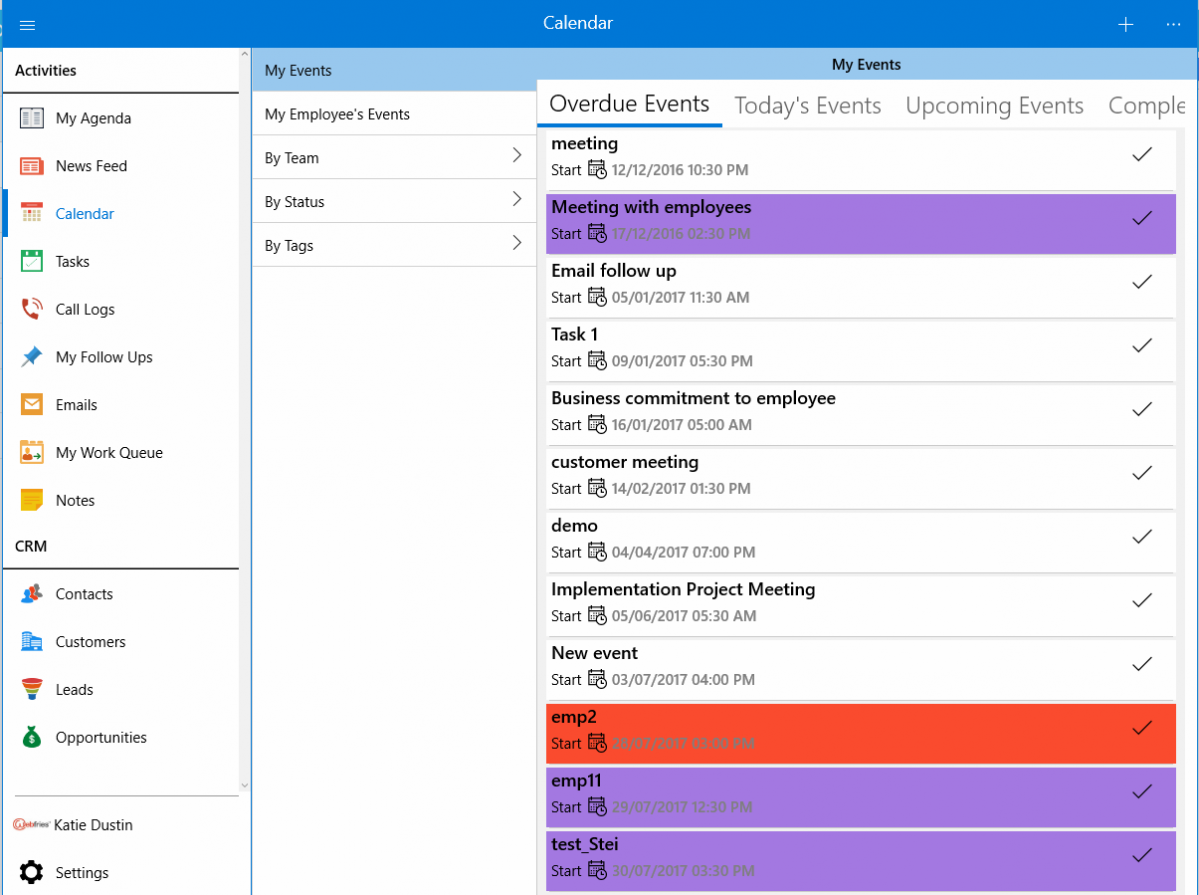
My Events – You can view “My Events” in list view. Creation of new events(My Event) is possible from this page too by clicking on the “+” icon. In list view, you can view overdue events, today’s event, upcoming event and completed event.
My Employee’s events – On selecting this, you can view their event in list view. Creating new events is possible.
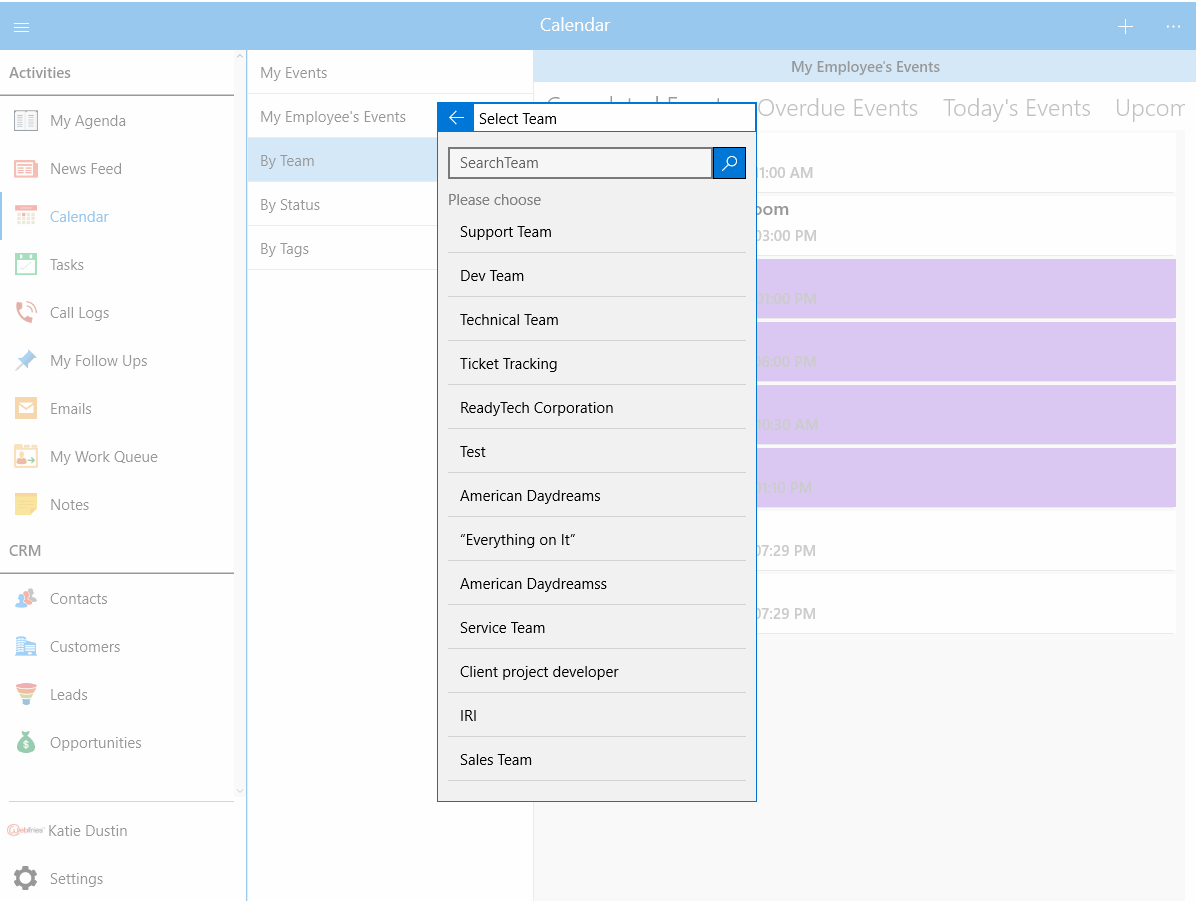
By Team – You will see all your Teams here and on selecting a single team helps you to view your team’s event created in the Calendar view. You can initiate a new event from this page.
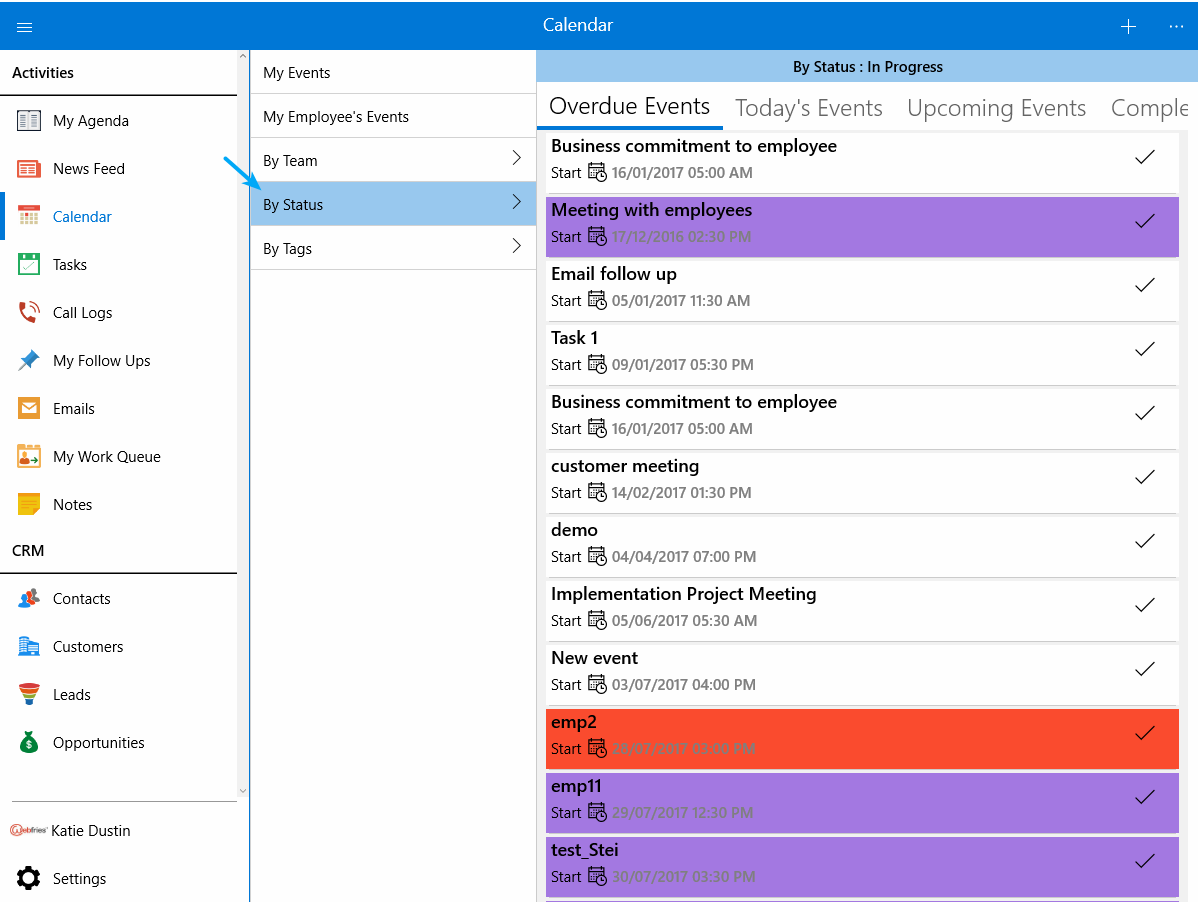
By Status – All the status will be listed and on choosing any status will lead to a listview. You can view overdue events, today’s event, upcoming events and completed events. New events can be created.
By Tags – Your created tags will be listed and on selecting any tag helps you to view the events created with the selected tags associated. Overdue events, today’s event, upcoming events and completed events can be seen.
- Homepage for My Follow ups – On choosing “My Follow ups” from the Activities menu, you will be directed to Follow ups homepage. You can view “My follow ups”, “My Employee Follow ups”, “Recently completed Follow ups” and “By Apps”. It is also possible to create new follow up by clicking on “+” icon.
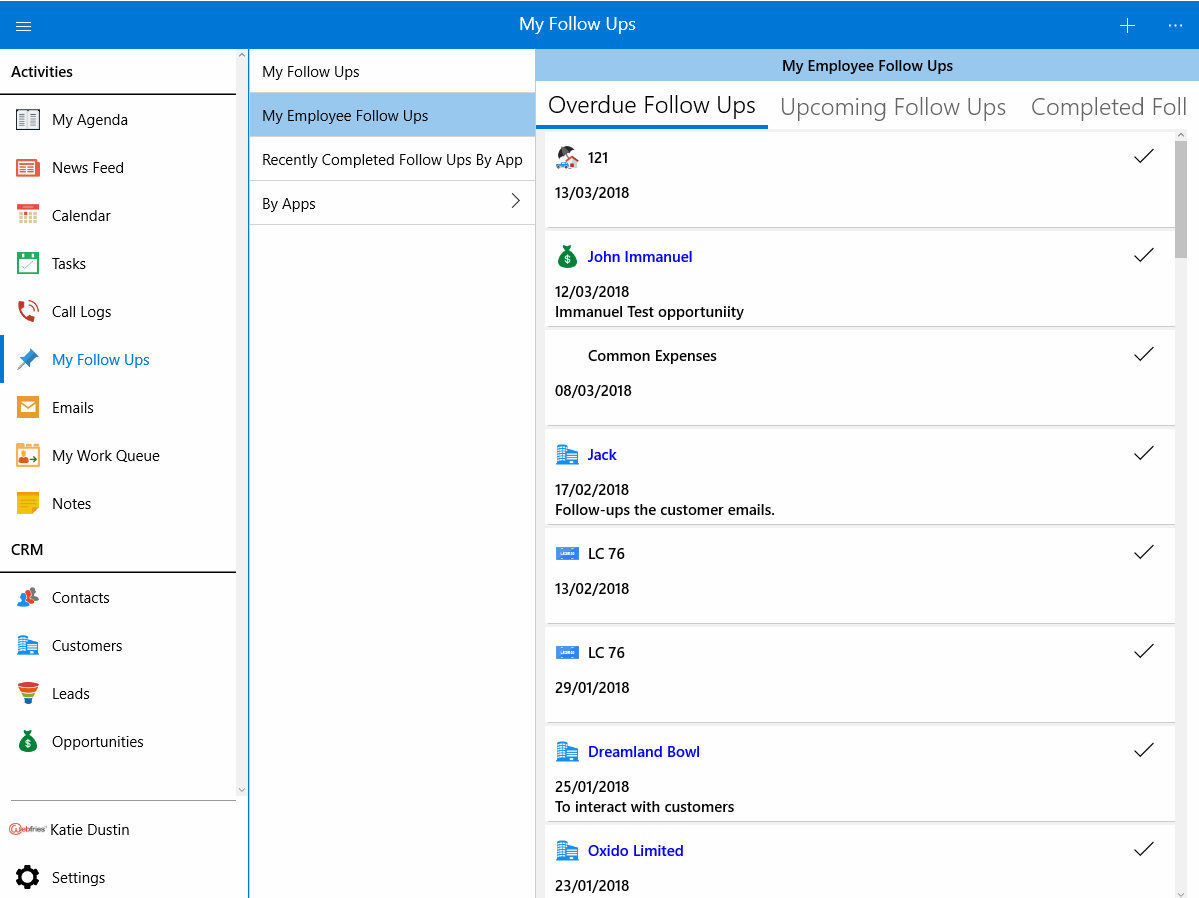
You can view your created Follow ups in ”My Follow ups” and your Employee’s follow-ups in “My Employee Follow-ups”. Both can be viewed in the list layout.
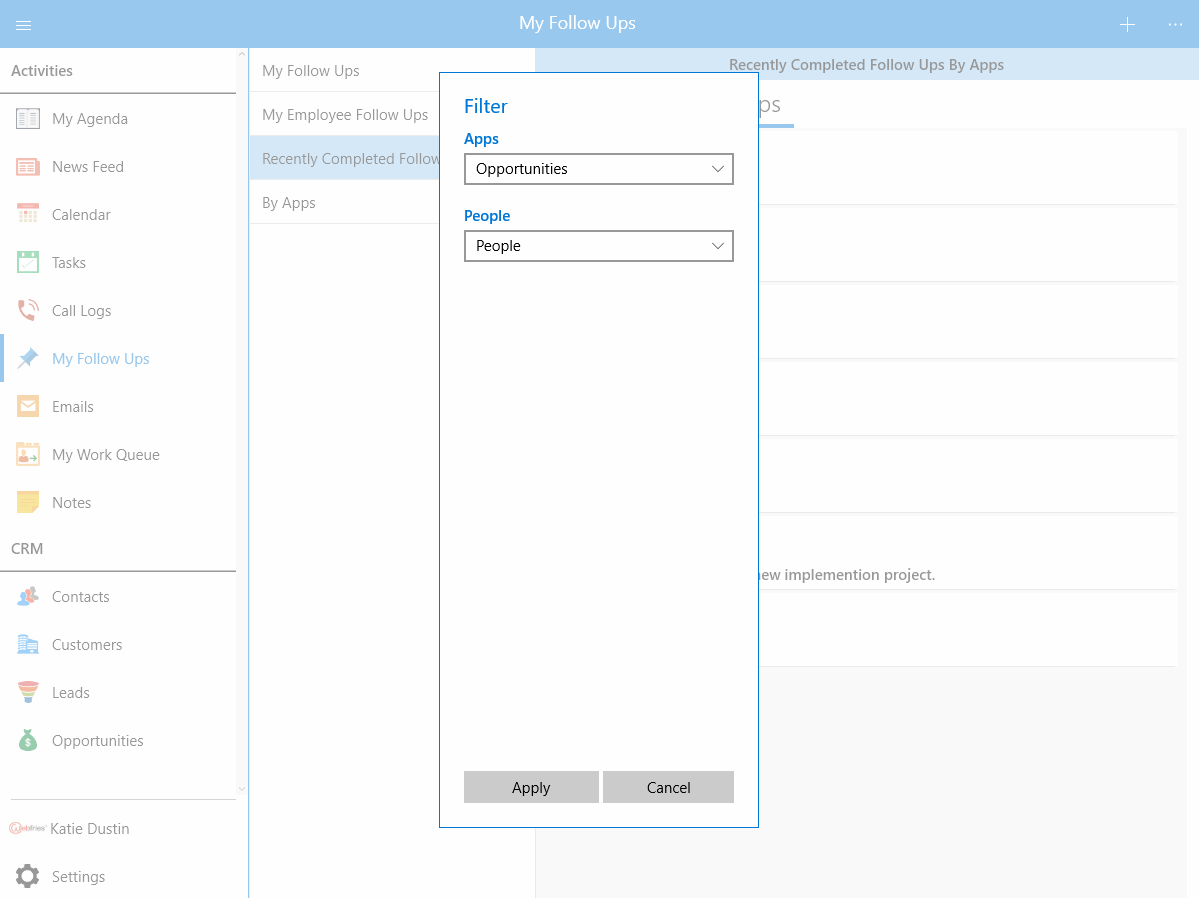
Recently completed Follow ups helps you to view the follow-ups which got completed recently. You can also filter for both Apps and People and view their Follow ups by selecting “Filter” option from “More” icon.
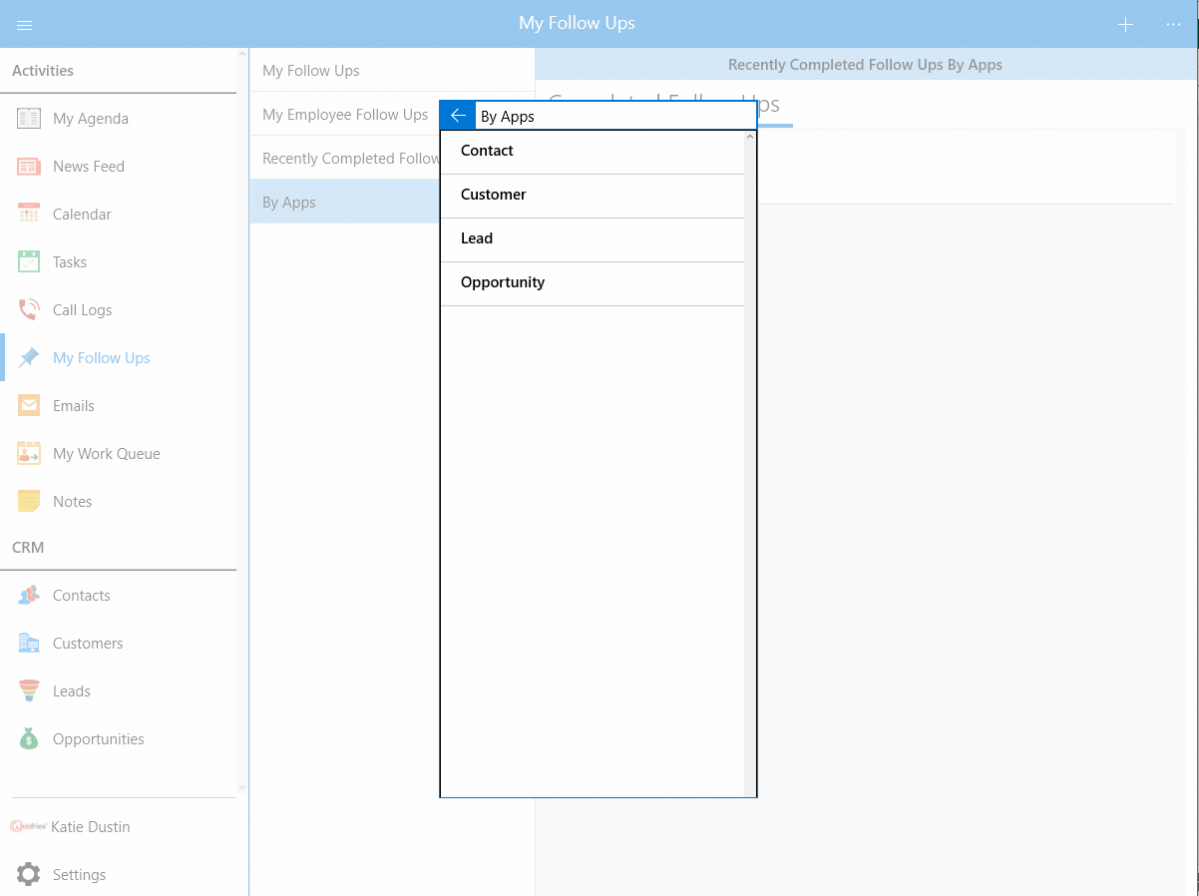
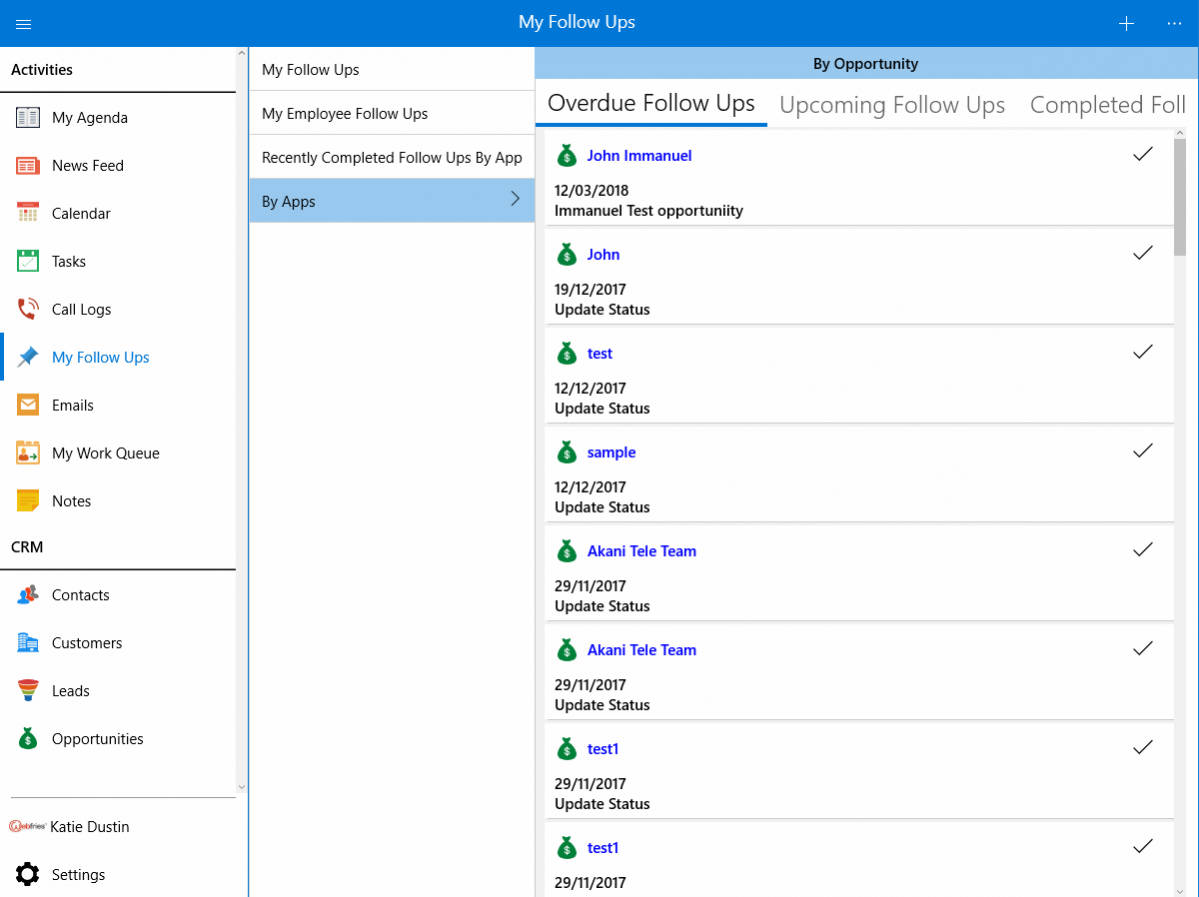
On clicking on “By Apps” will display you with a pop up showing the Apps. You can select any Apps, for instance – opportunities App. You can now view the Opportunities Follow ups in list view. Filtering is also possible. Addition of new Follow up can also be done.
Searching is also possible from all the pages. Click on “More” icon and select on Search or Advanced Search option to search for your follow ups using single field or multiple fields.
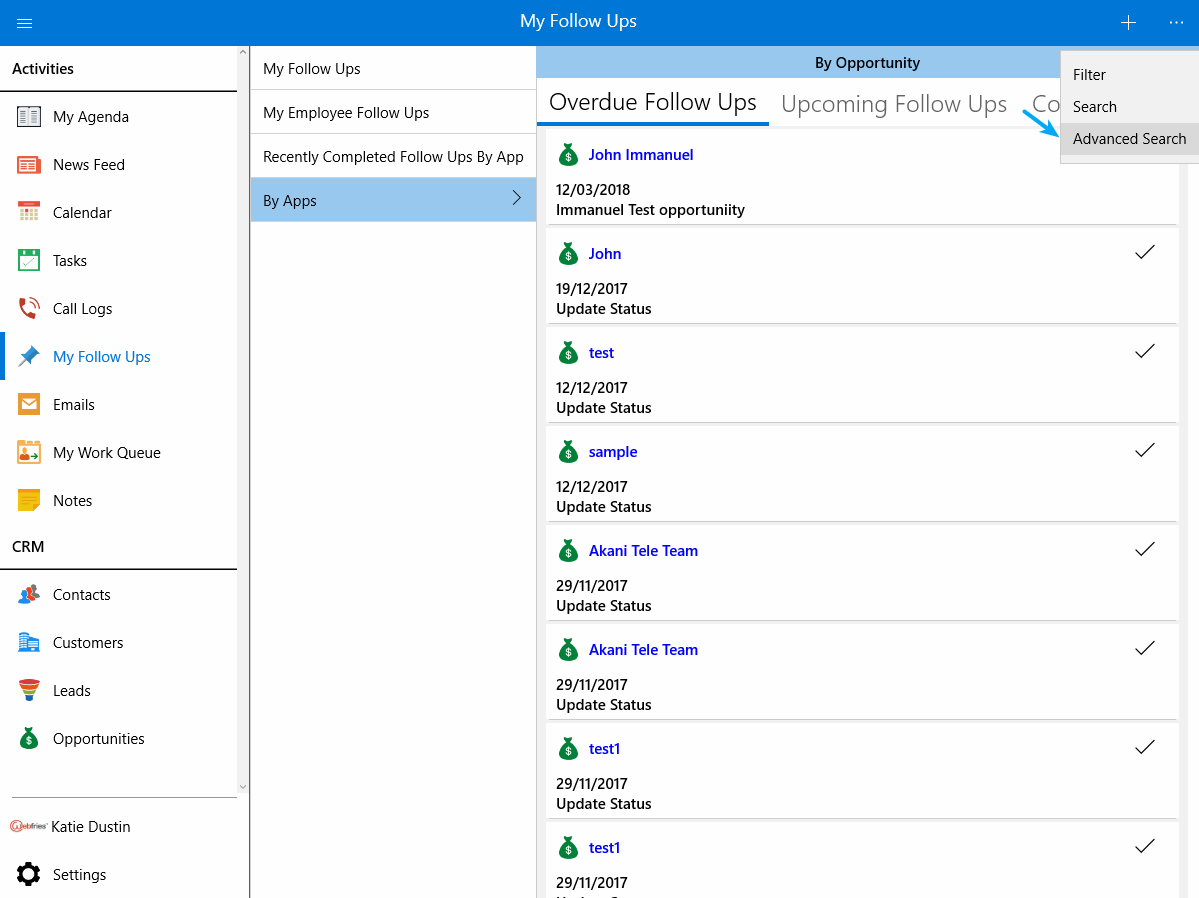
Here Advanced Search
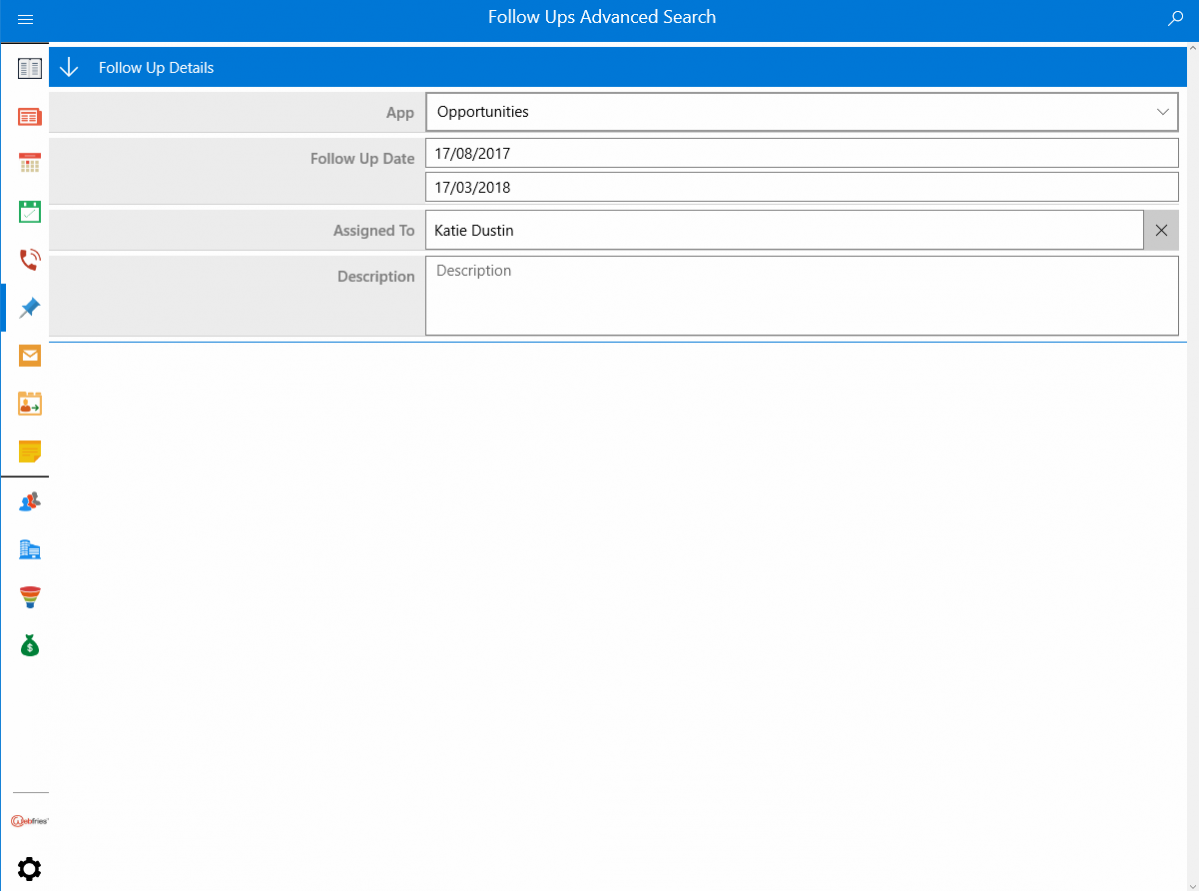
- Homepage for Call logs – Call log home page will display you with “Show All”, “By Type” and “By Tags” fields. You can create your call log by clicking on “+” icon. “New Call log” page will be opened where you can provide your call log details and then click on “Create” button.
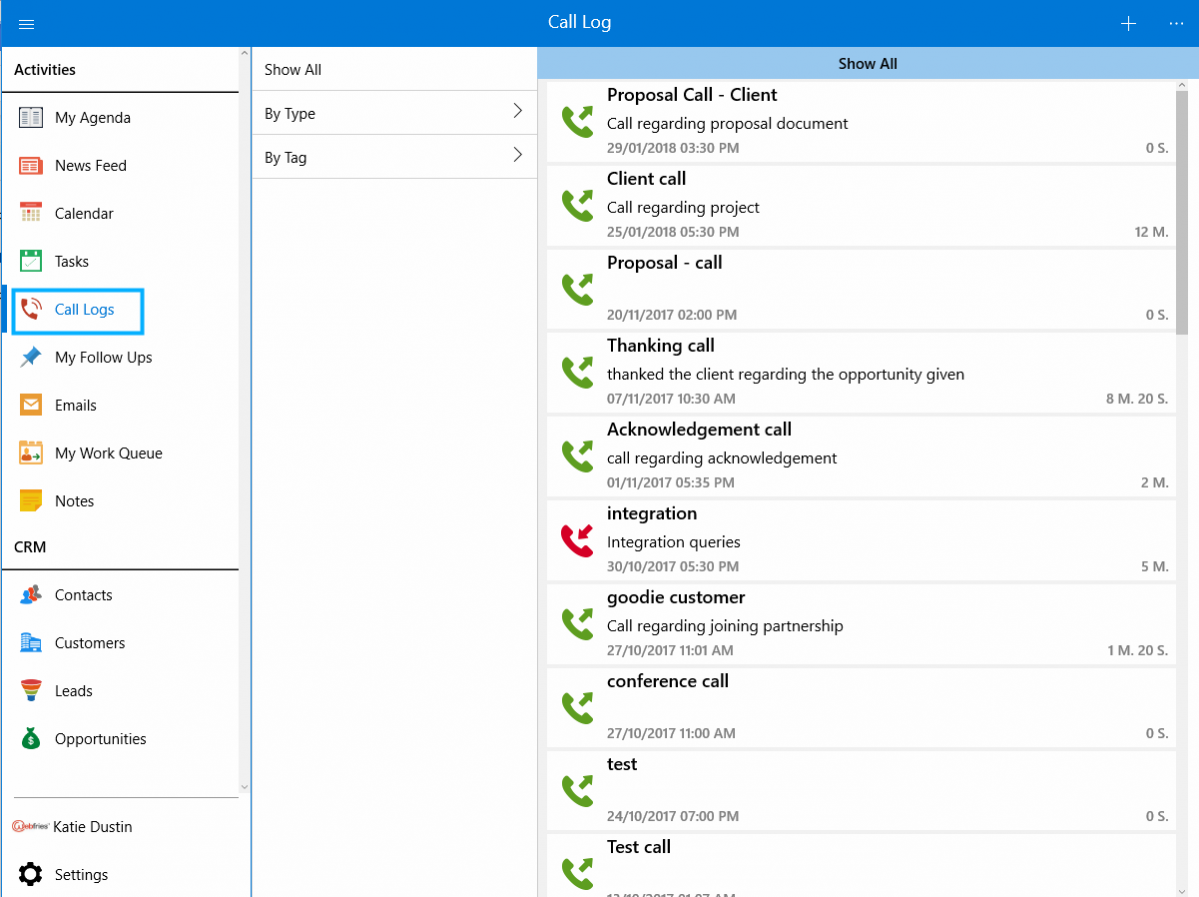
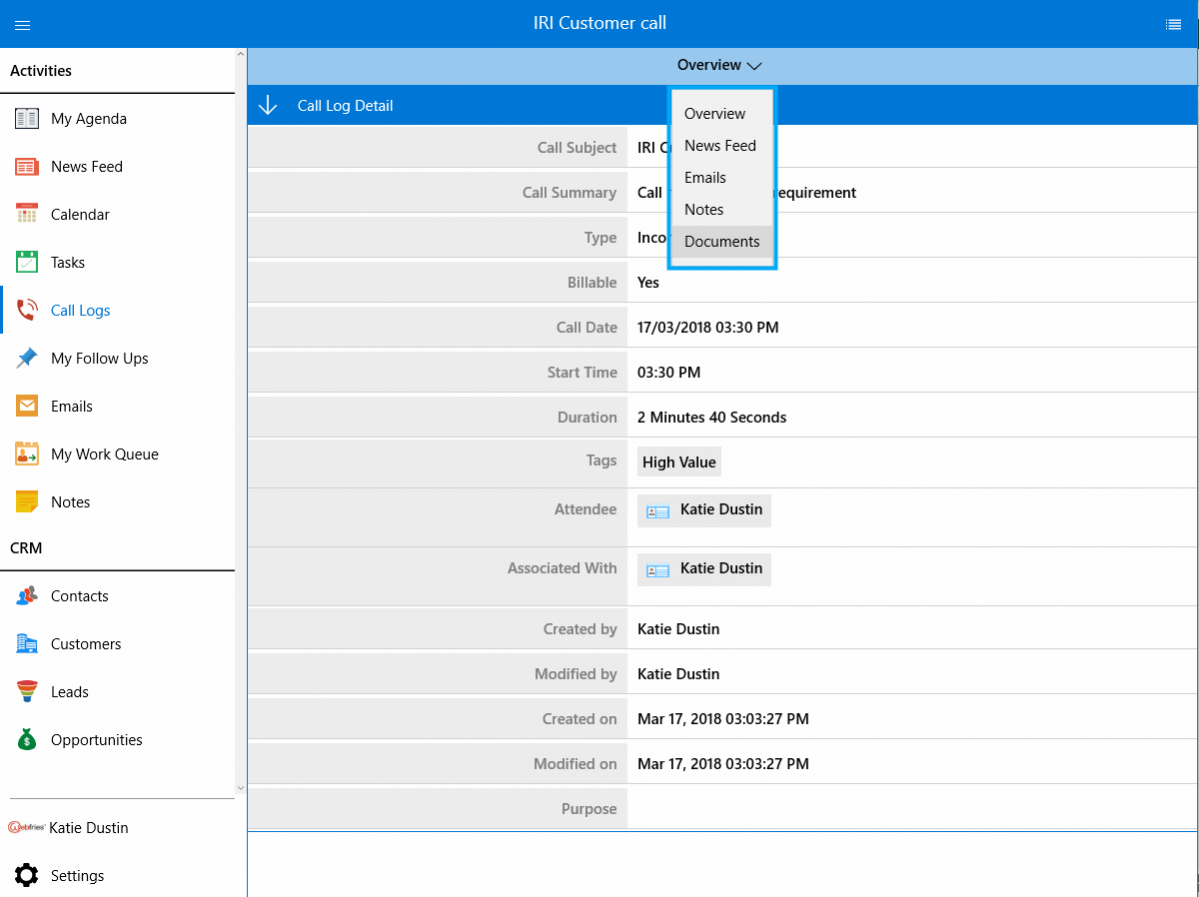
On selecting “Show All”, you will be opened with all your call logs. Select a particular call log to view its details. More icon provides you with the option of Editing the call log, to add notes, documents, events and tasks, to schedule follow up, to send mail. The delete option is available to delete the unessential call log created.

Clicking on drop down near the Call log helps you to view the activities like Newsfeed, email, notes and documents
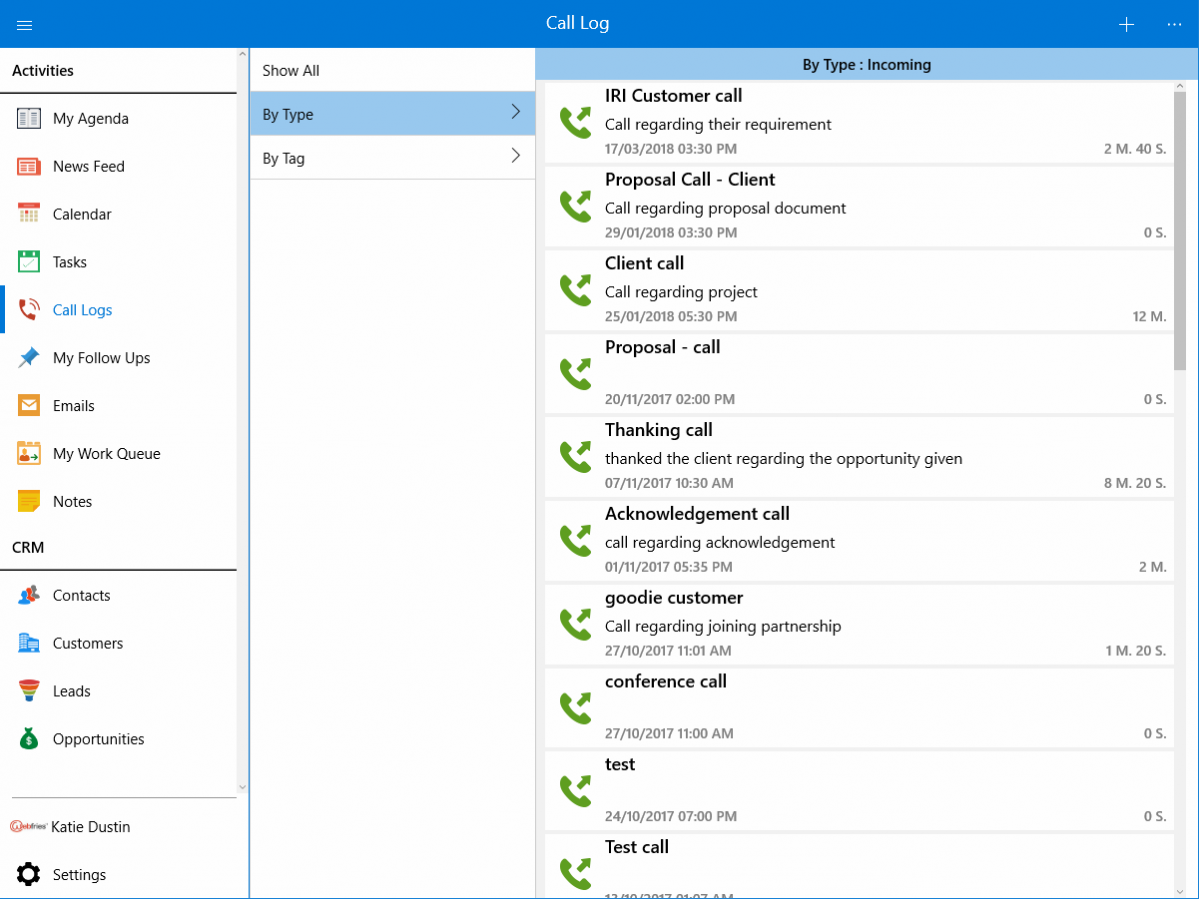
You can view Call logs based on “By Type” and “By Tags”. On clicking “By Type”, you will be directed to new page with Incoming and outgoing. For instance: Clicking on Incoming will display you the incoming call logs.
- Homepage for Tasks – Tasks home page consist of “My Tasks”, “My Employee’s task”, “By Completed Tasks”, “By Status”, “By Priority”, “By Tag”, “Direct Tasks” and CRM.
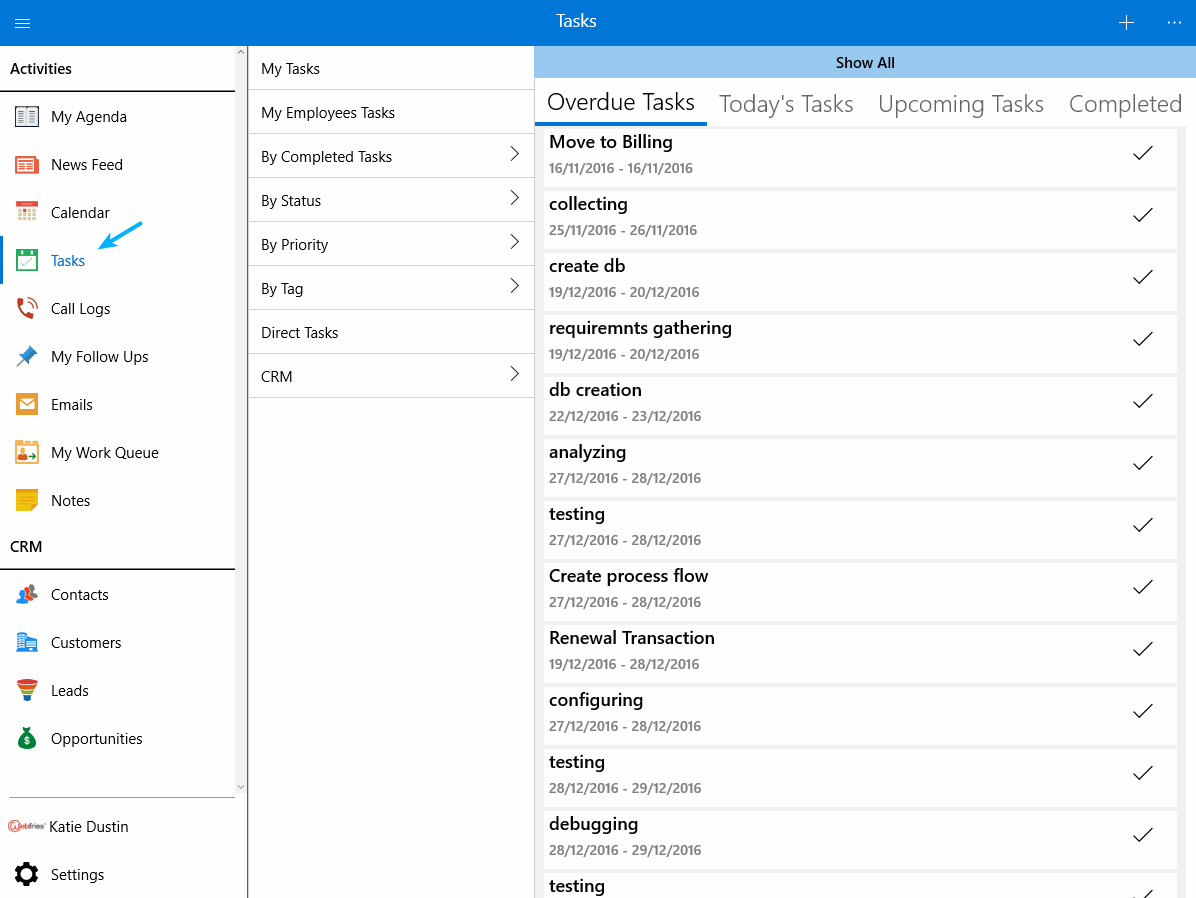
My tasks and My Employees Task allows you to check for your and your Employees today’s task, completed task, overdue task and upcoming tasks in table view. You can search for your tasks by clicking on the “More” icon and selecting Search or Advanced search option.
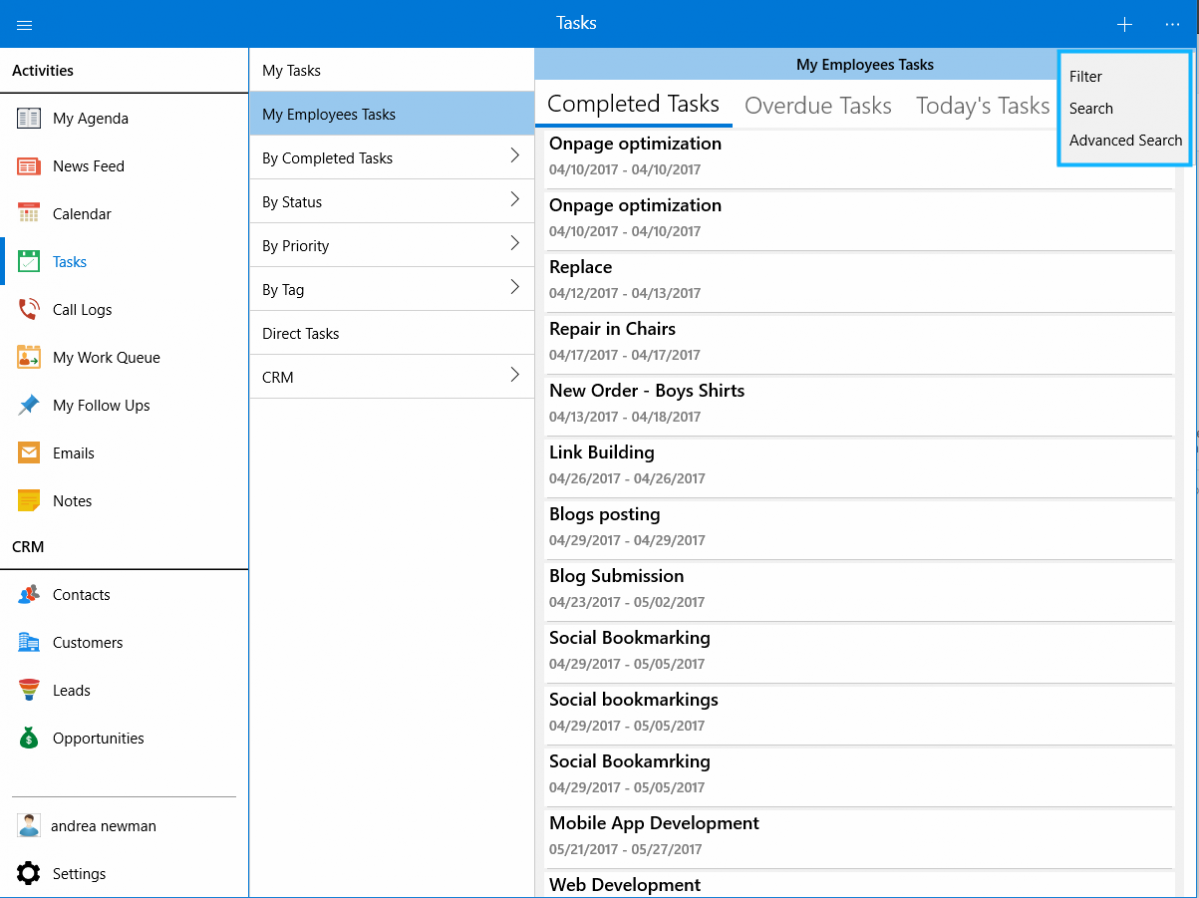
Search helps you in providing single field to search for your task whereas you can search for tasks using multiple fields by selecting Advanced search option. Creation of new task is by clicking on “+” icon.
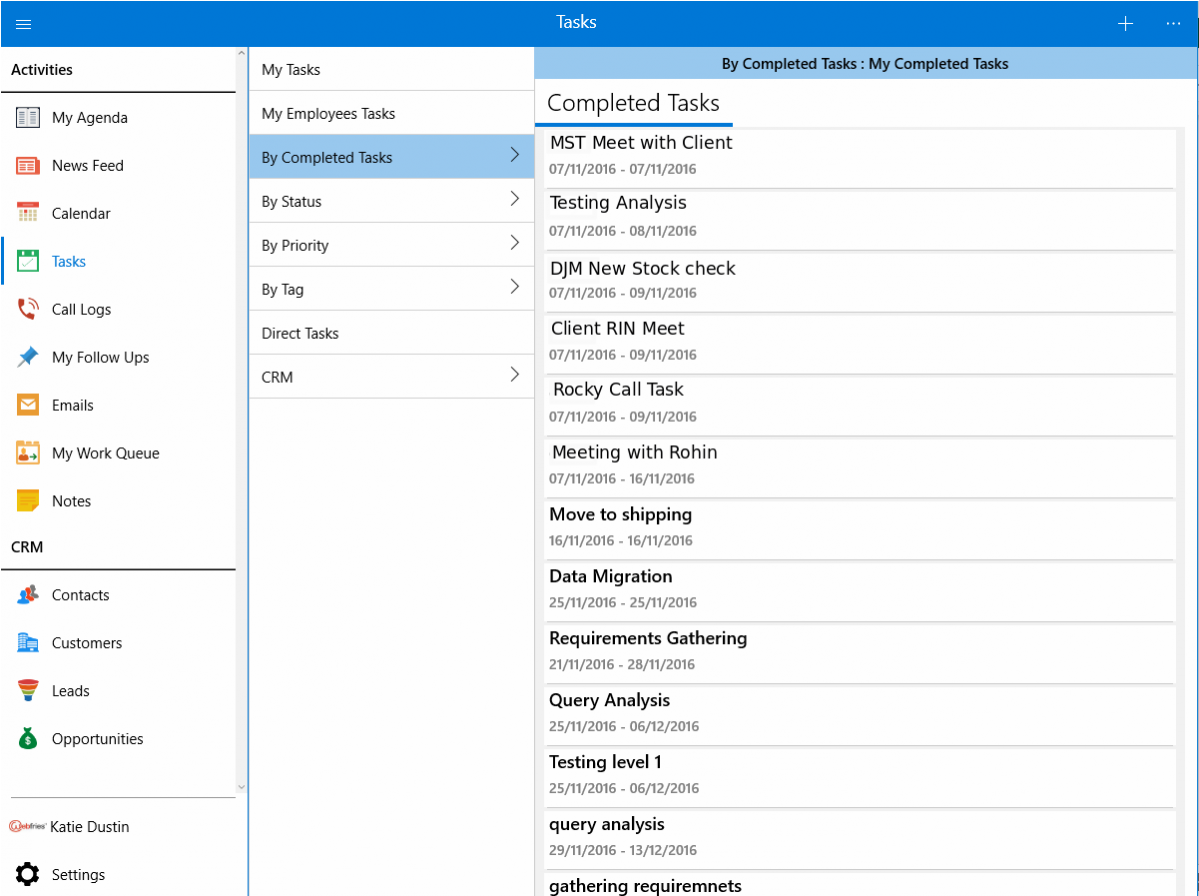
Similarly you can view your Employees task in “My Employees Task”. On clicking on “By completed task”, you will be opened with a pop up where you can select either My completed tasks or All completed tasks. On selecting, you can view the completed task of those selected object.
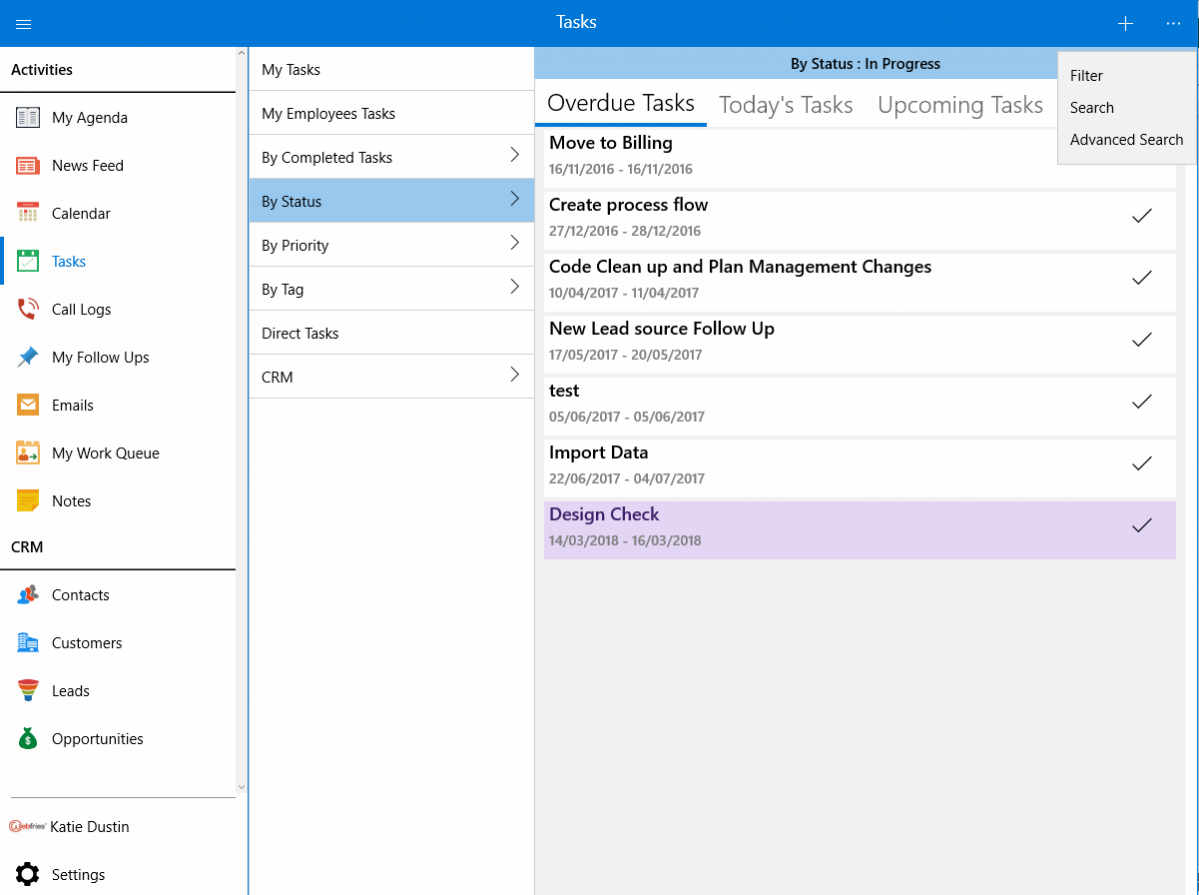
You can select for status or Priority from “By Status” or “By Priority” and see the tasks according to the status or priority.
And also, on choosing “By Tag”, you will be opened with a pop up and you can select your tags. Once on choosing, you will be viewing the list of tasks under the selected tasks.
Direct tasks allows you to check for all the tasks irrespective of any category. Once clicking on CRM, you can select your particular CRM app and the tasks related to that particular app will be displayed.

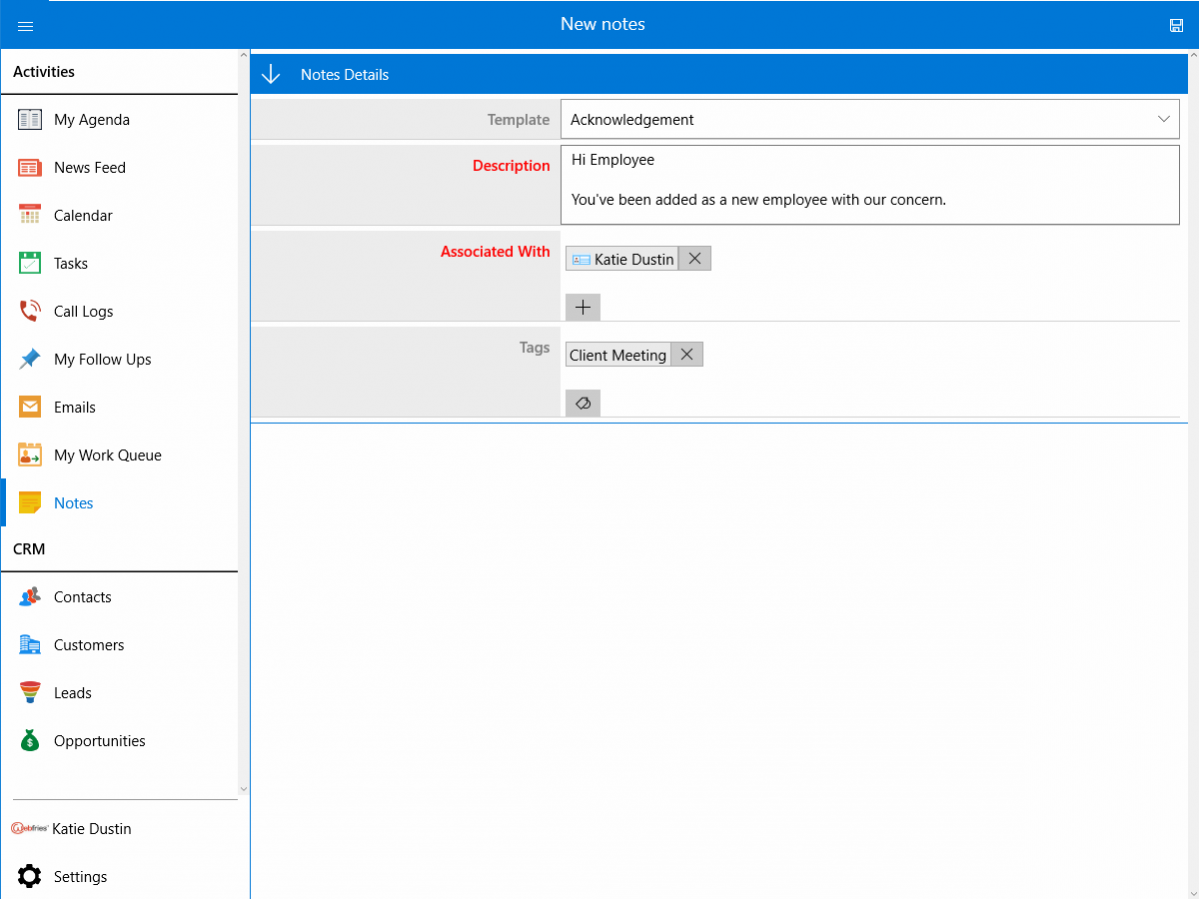
- Homepage for Notes – This is also same as Call logs where you can look for “My Notes”, “By Tag” and “My Employee Notes”. Selecting “My Notes” will list you with all your notes. Searching for notes by the Simple and Advanced search is possible.
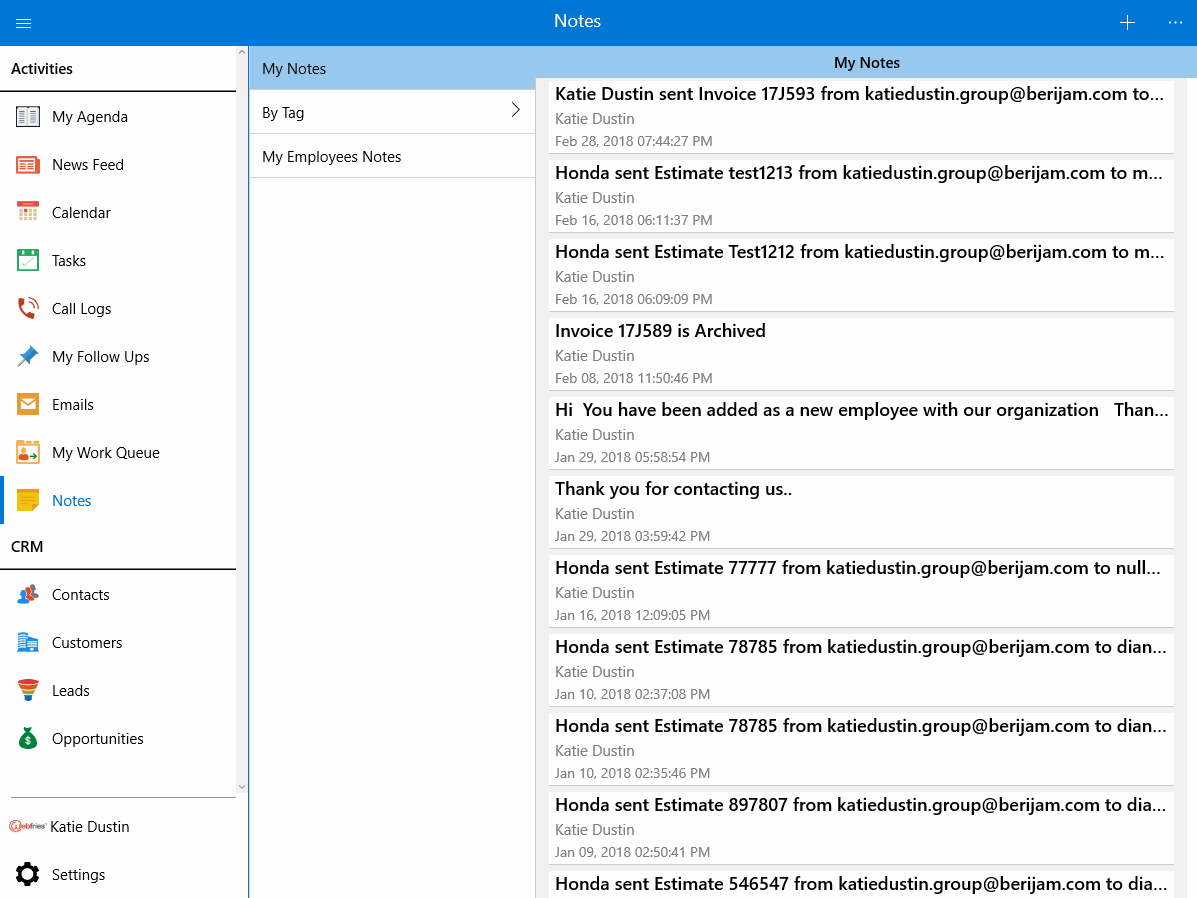
Clicking on “+” icon enables you to create a new note. You can even associate your notes with any apps and add tags. Finally, click on “Create” button to complete your note creation.
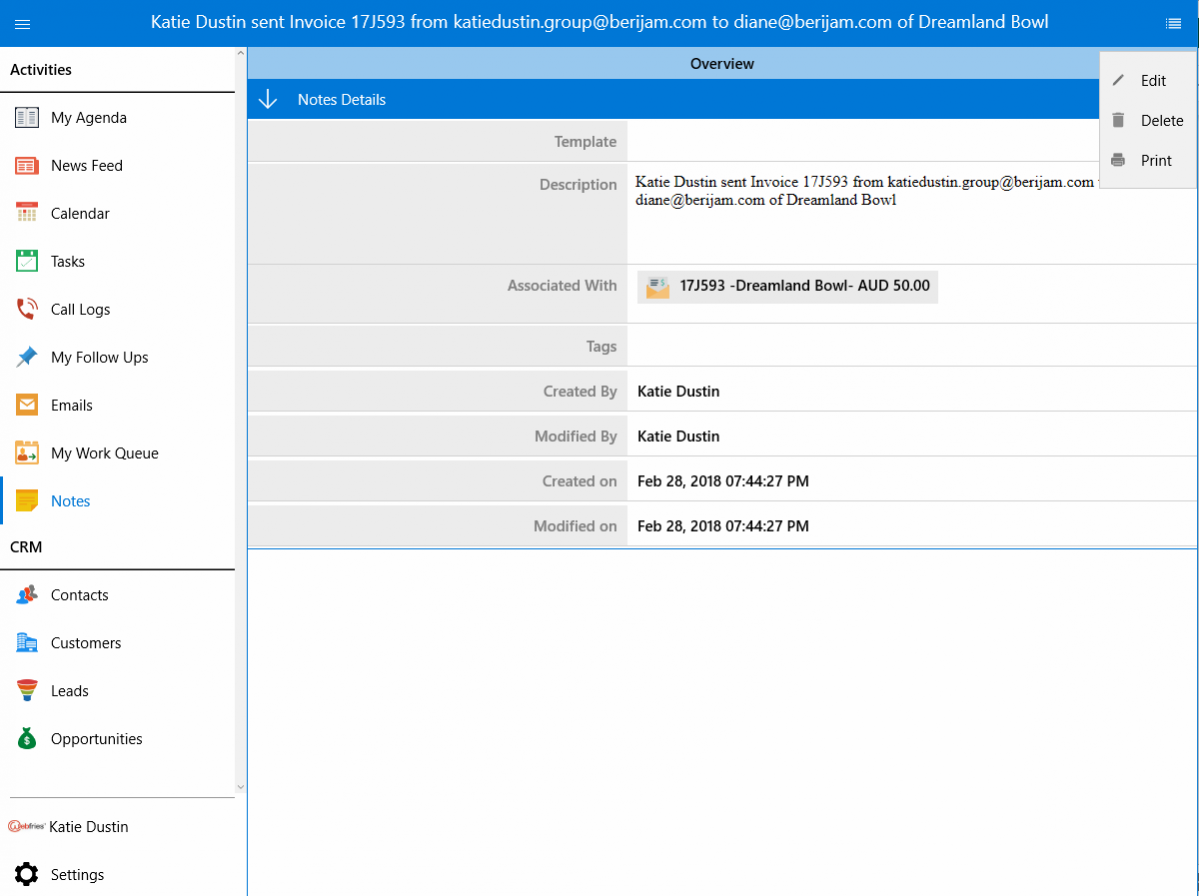
Select a particular note from “Show All” option to view its full details. You can edit or delete the notes. We have a new option of printing your notes by selecting “Print” option from More icon.
“By Tag” option allows you to view the notes associated with the selected particular tags. You can edit the note and delete if not needed.
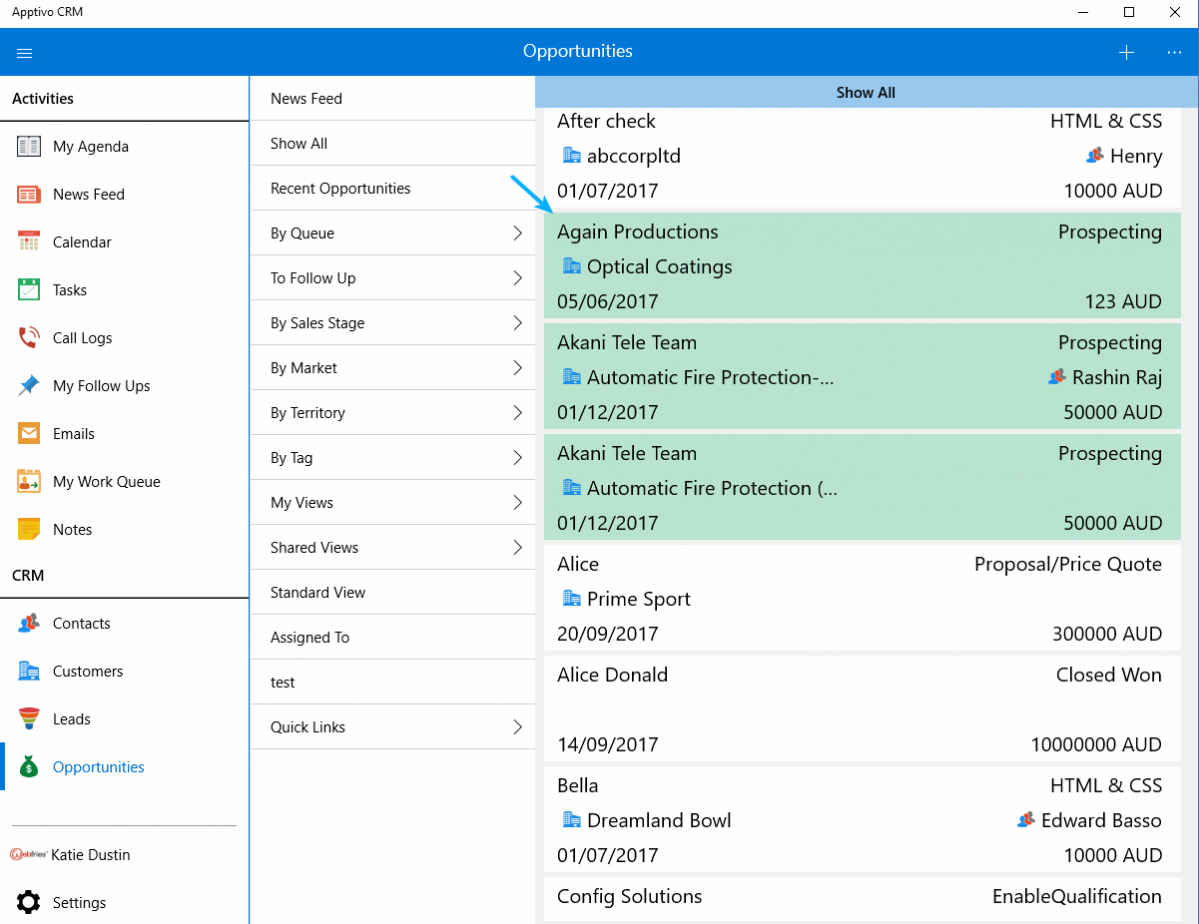
“My Employee Notes” displays you the notes of various employees. You can either select “All” to view all the employee’s notes or a particular employee to view his/her notes. Edit and delete are possible. - Highlight Opportunities – We have added the highlighting feature in Opportunities App of Windows CRM in this release. This highlighting feature allows you to easily track the Opportunities based on the highlighting condition.
You can configure highlighting rules in the web which gets reflected in Windows App.
In the Web, Go to Opportunities App. Click on “More -> Settings -> Opportunities -> Highlights”. Click on Create button to create new highlights with the prior condition. Here, we have given Lead Source = Cold Call. So, whenever the Opportunity is created with Lead source as Cold Call, it will be highlighted.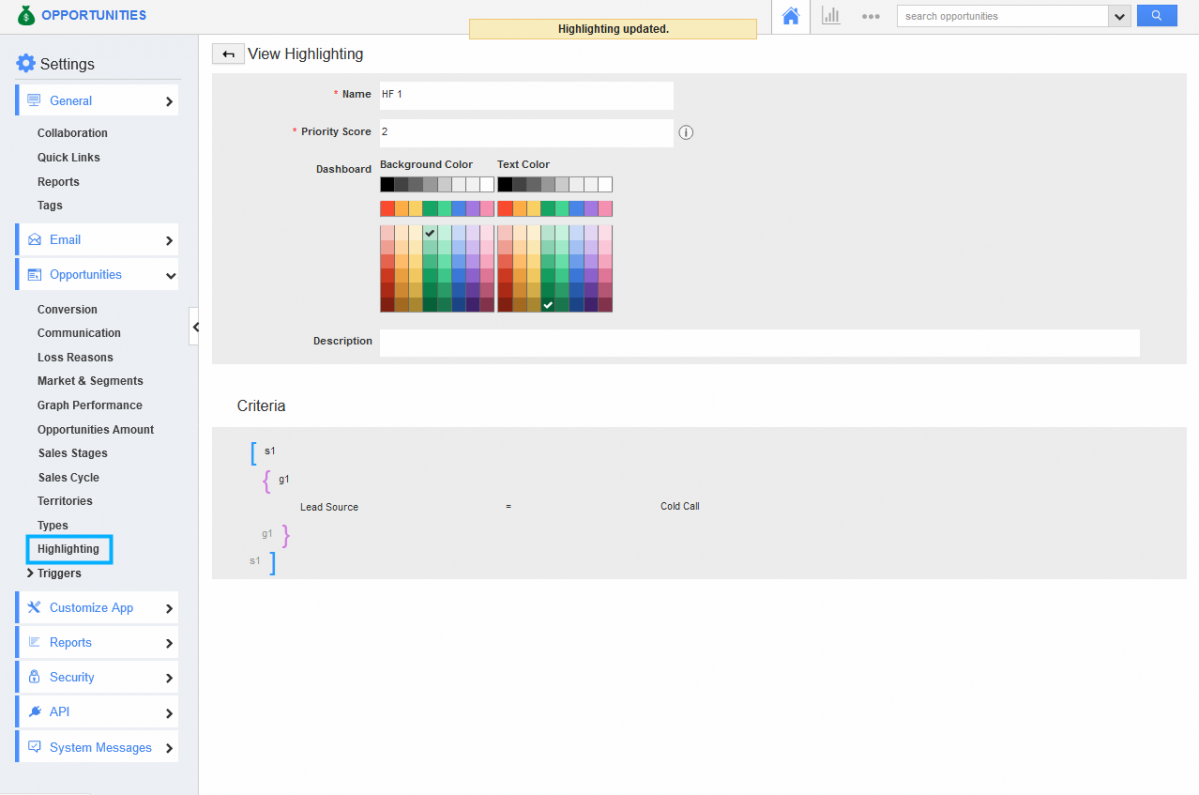
Once updated in Windows, you can check for highlighted features in Opportunities App.
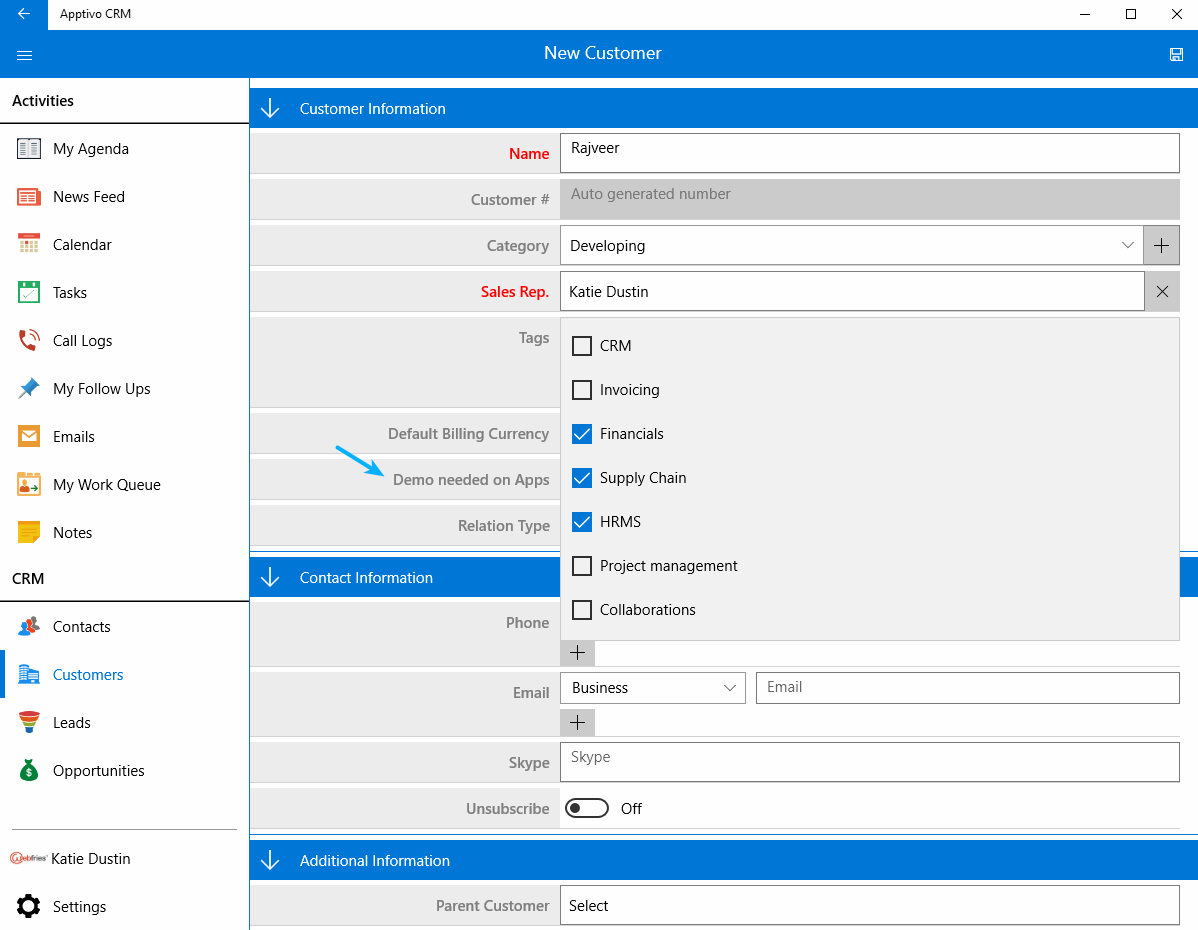
- Multi select drop down – We have incorporated the Multi select drop down in all the CRM apps(Customers, Contacts, Leads and Opportunities). This lets you to pick more than a single field. By default we have a option of selecting only a single field. In case of choosing multiple fields, we can configure “Multi Select” option from the web layout. For instance, let’s take Customers App.
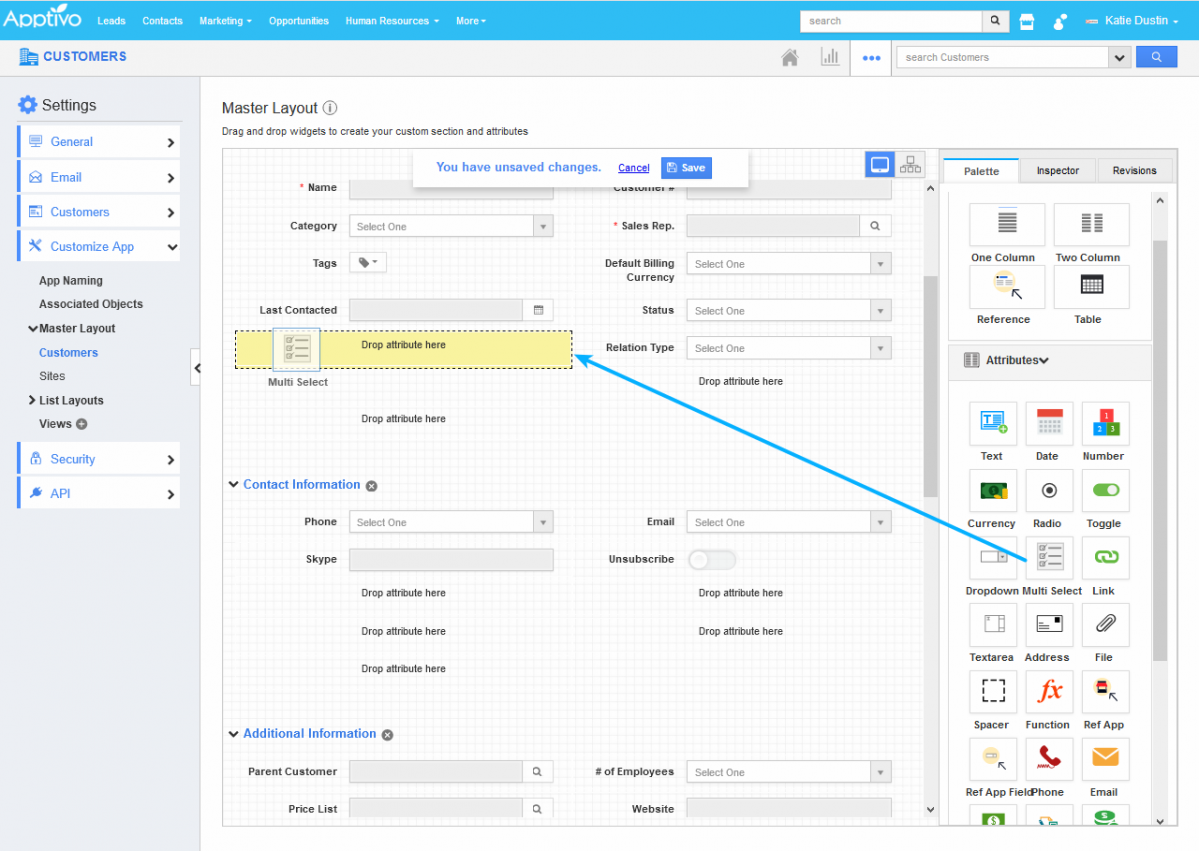
In Web, move to Customers App. Go to Settings -> Customize App -> Master Layout. Drag and drop the “Multi Select” field and rename as you wish from the Inspector tab. Provide the values and save the changes. For instance: Demo needed on Apps, with various apps as values.

In Windows, move to Customers App and you can view the field “Demo needed on Apps” field in the creation page. Select your list of Apps needed.
- Highlight Call logs, Tasks and Events – We provided with a new option of highlighting Call logs, Tasks and Events with your required colors by providing certain criteria to be satisfied. Set your own criteria for highlighting and once your object satisfies the criteria, the object gets highlighted by the color provided.
Highlighting settings can be customized in the web which gets reflected in Windows.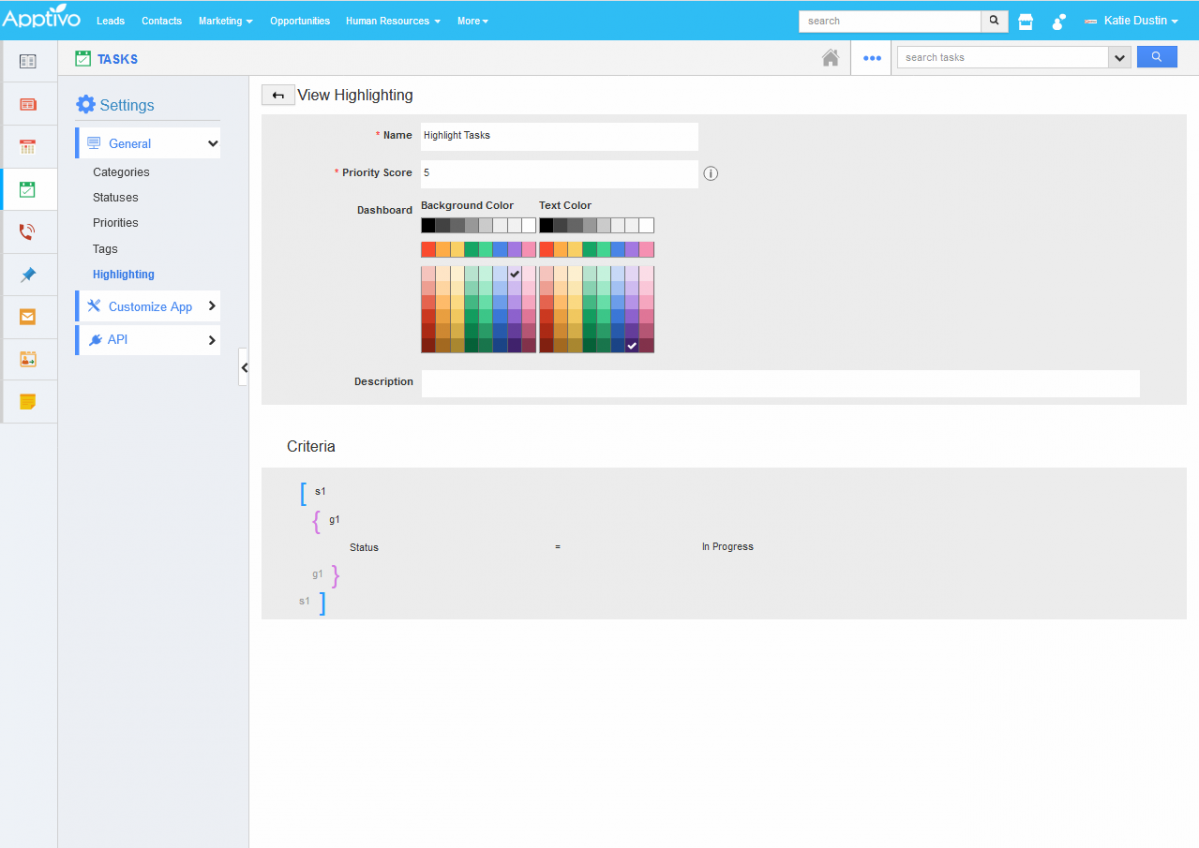
For instance: Let’s consider Tasks. In web, move on to “More -> Settings -> General -> Highlighting” from Tasks page. Create your own highlighting condition. Here if “Status = In Progress”, the tasks created will be highlighted.
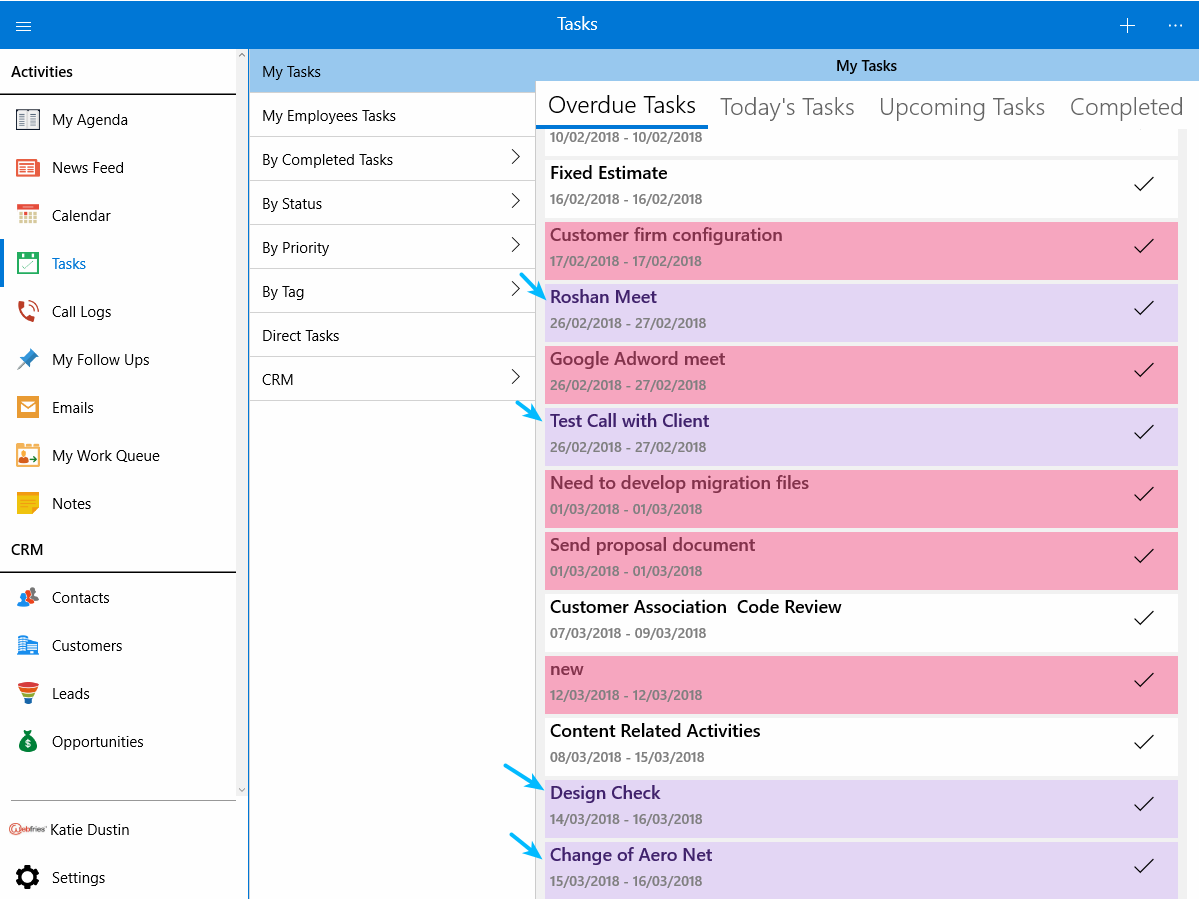
Now in Windows, once you move on to Tasks page, you can see the tasks which are in progress got highlighted. The same appears to Call logs and Events.
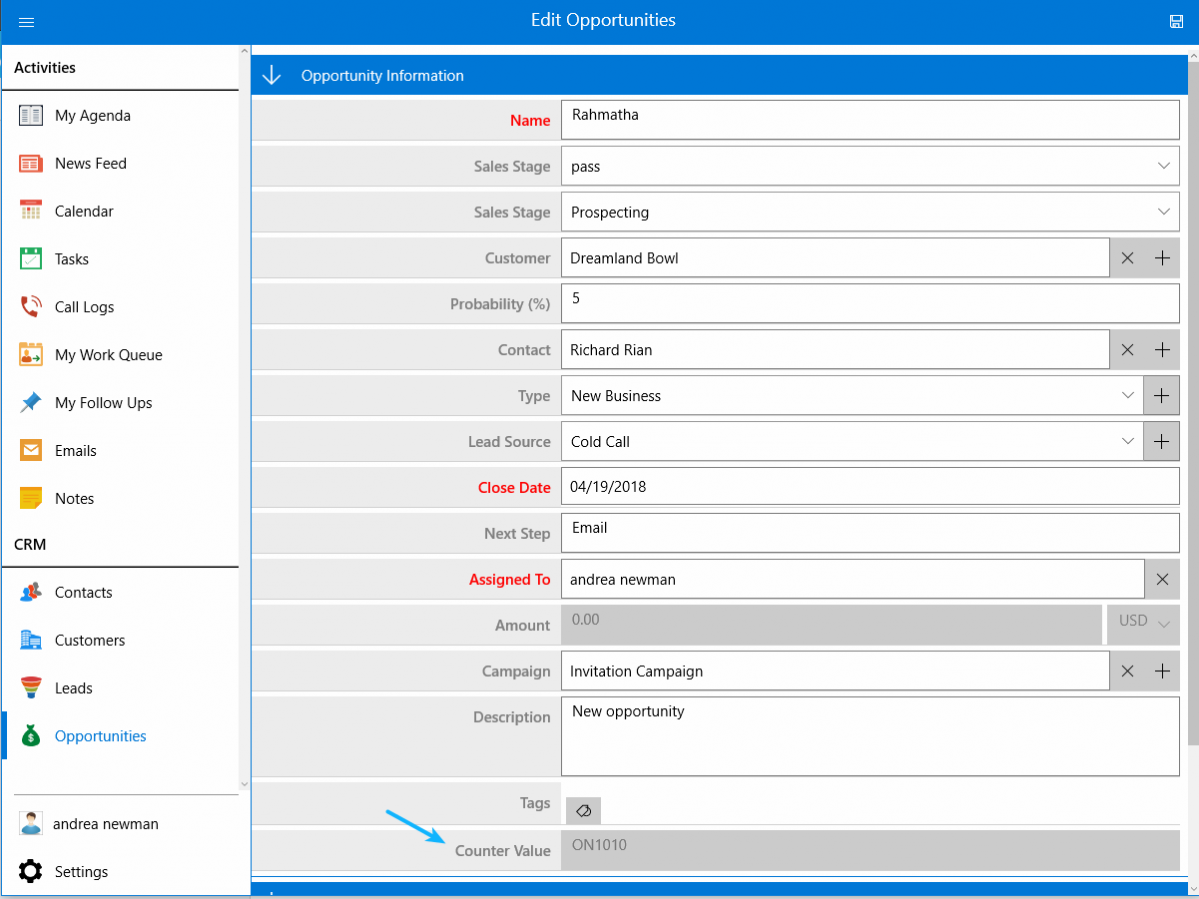
- Counter attribute in Opportunities App – Counter Attribute empowers you to prefix your Opportunities with specific numbers. This feature causes you to easily recognize the Opportunities and moreover recover the Opportunity information when needed instantly.
Counter Attribute can be configured in Web layout which gets reflected in the windows app.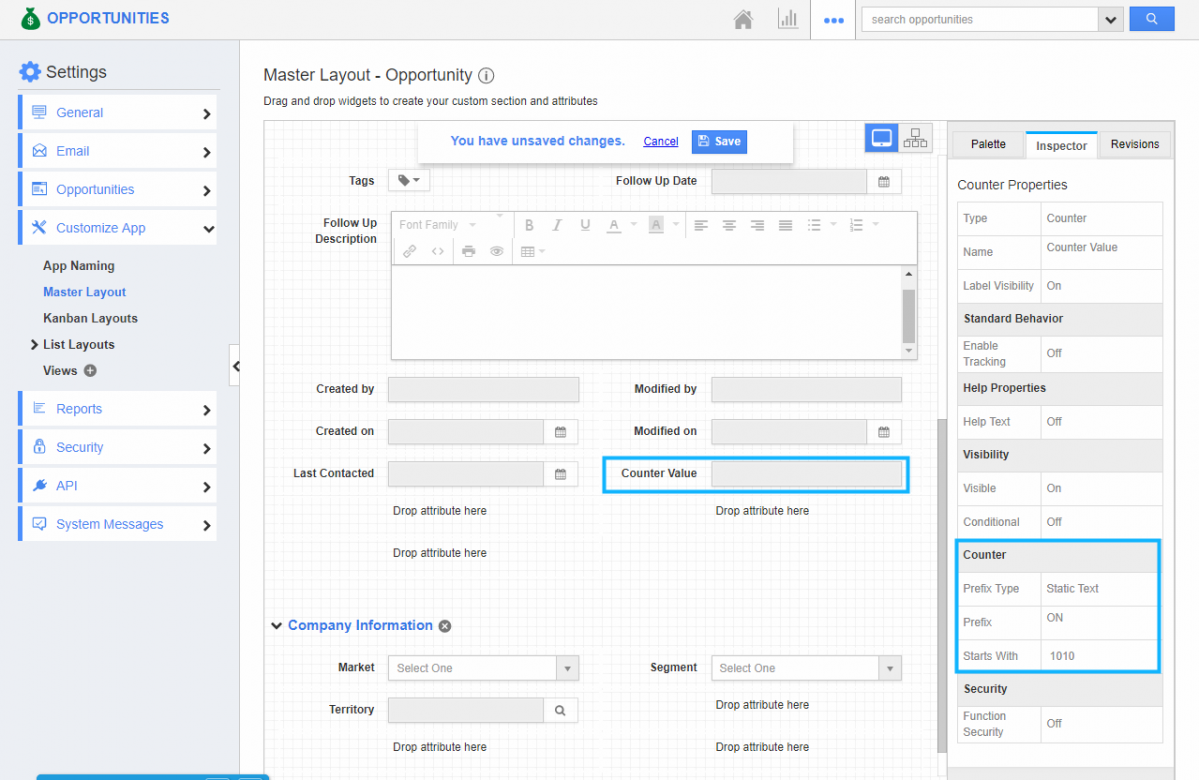
In Web, move on to Opportunities App. Go to Settings -> Customize App -> Master layout. Drag and drop the “Counter” field in the required place. Scroll down till the “Counter” section in the Inspector tab.
Here you can provide the “Prefix type”, “Prefix” and “Starts with”.
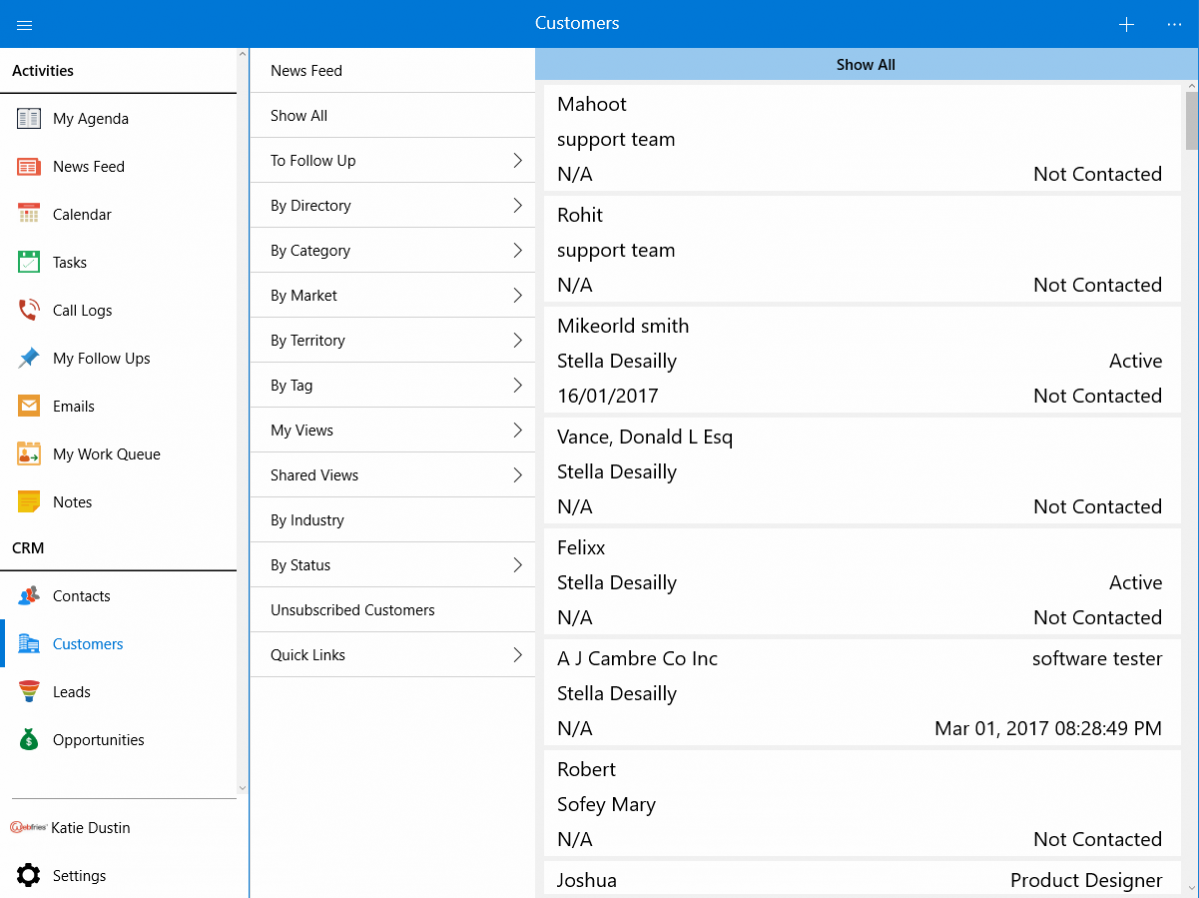
For instance: Prefix type- Static Text, Prefix – ON, Starts with – 1010. You can now view the counter attribute in Mobile after creating an Opportunity. - Sort Records based on the Mobile List Layout – One of the most remarkable features in this release is the sorting of particular fields in Windows listing page. This feature allows you to sort your Customers, Contacts, Leads and Opportunities either in ascending or descending order.
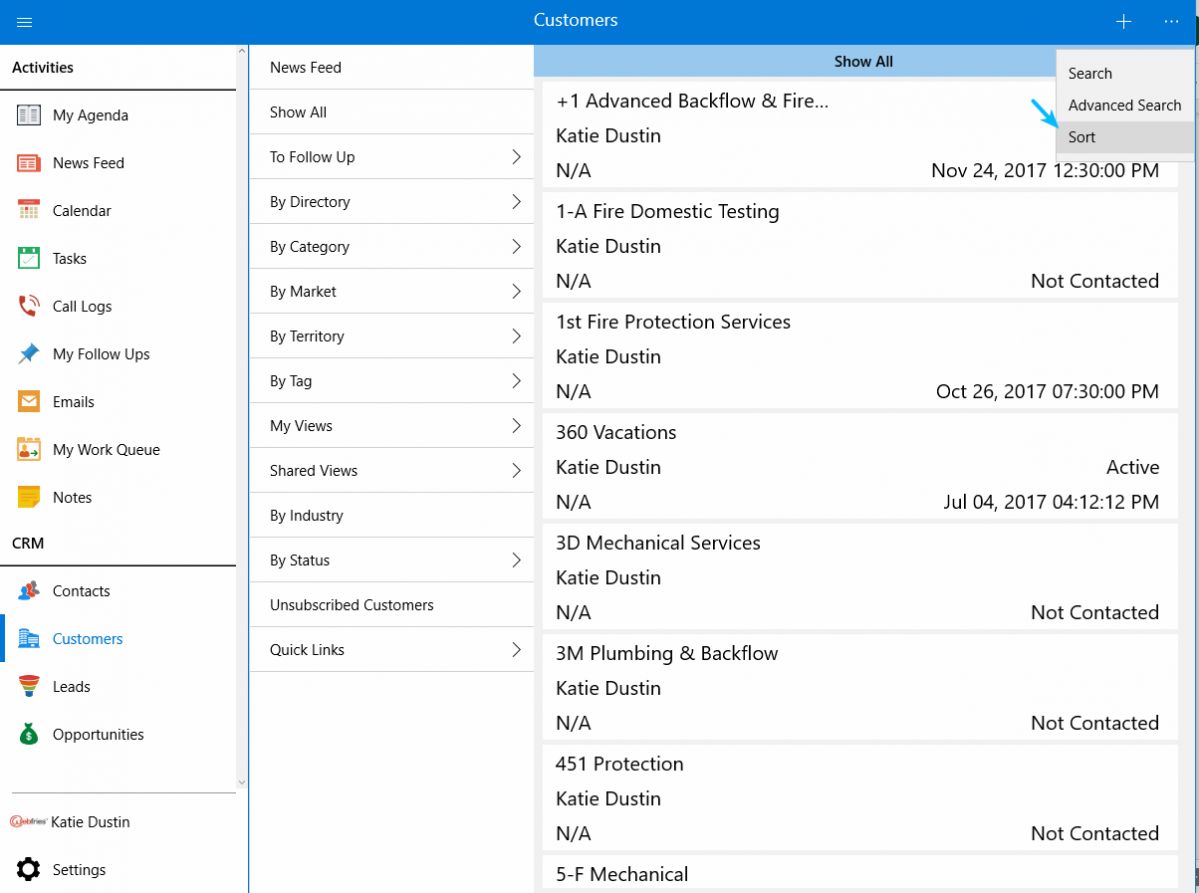
Let’s start with Customers App. It can be done by tapping on “More” icon. You can see the “Sort” field.
Select that and you will be opened with a “Sort By” pop up. Select the column which you need to sort and select the sort order(default or Ascending or descending). Sort Column displays you the fields present in apps list layout. Select your order and click on “Apply” button.
For instance: Sort Column – Sales Rep, Sort Order – Descending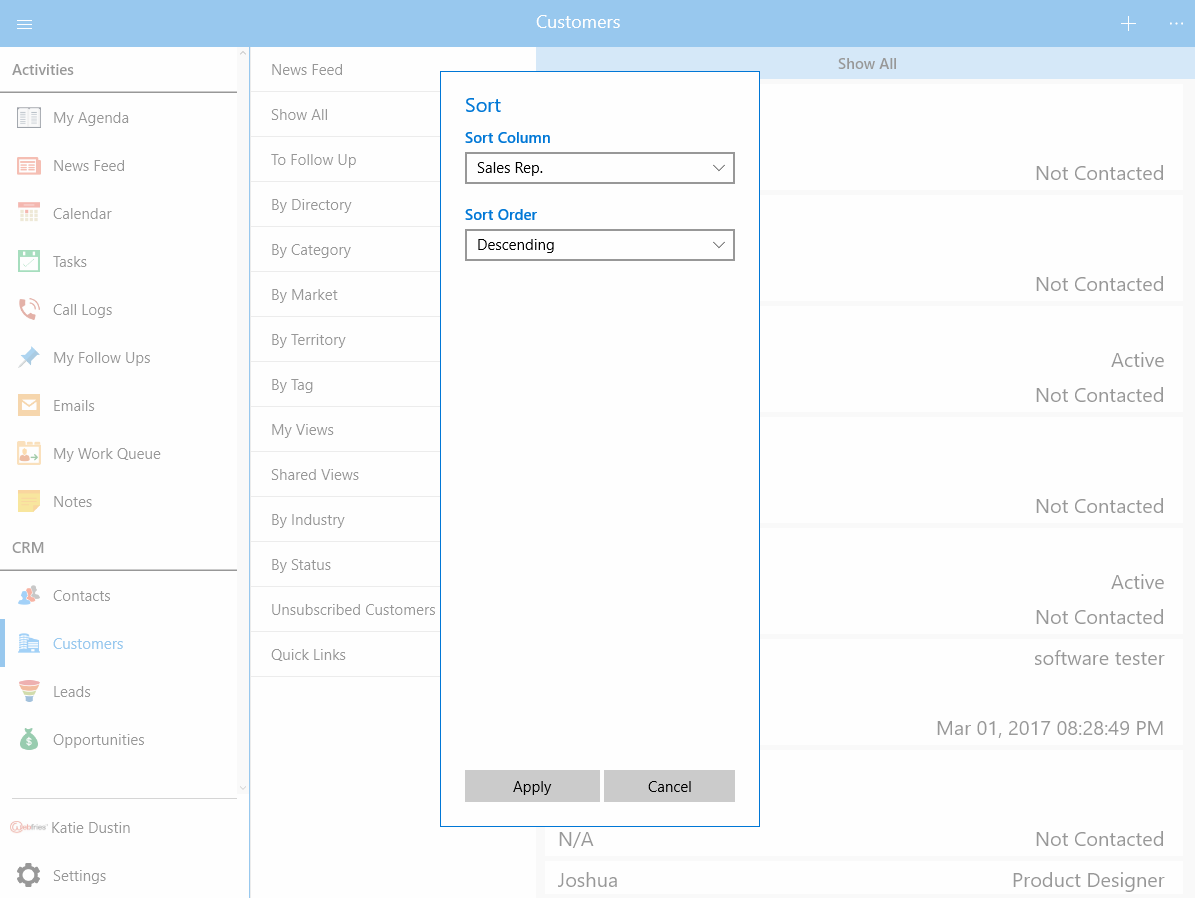
And the Customers List layout for the given “Sort by” will be displayed as,
- Entry and Exit criteria in Opportunities App – Opportunities App helps you to provide your sales stage with entry and exit criteria. Criteria can be provided in the web which instantly gets reflected in Windows.
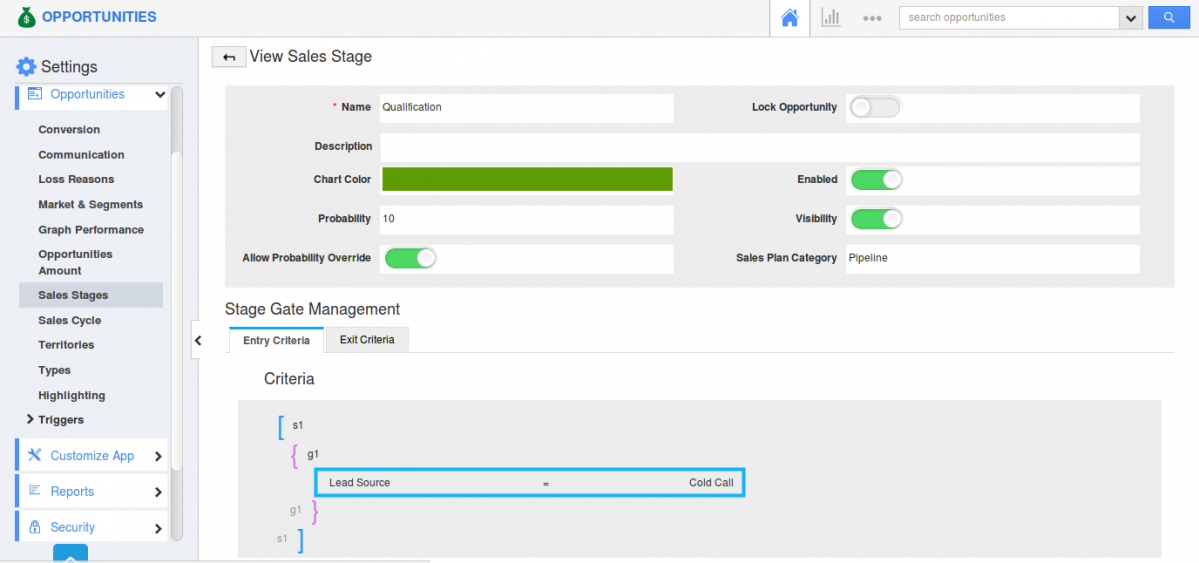
Move on to More -> Settings -> Opportunities -> Sales Stages. There you can view many default sales stage. Either select any sales stage or create a new sales stage. Here, we will take Qualification stage and provide with Entry and exit Criteria. Entry Criteria -> Lead Source = Cold Call and Exit Criteria -> Lead Source = Campaigns.
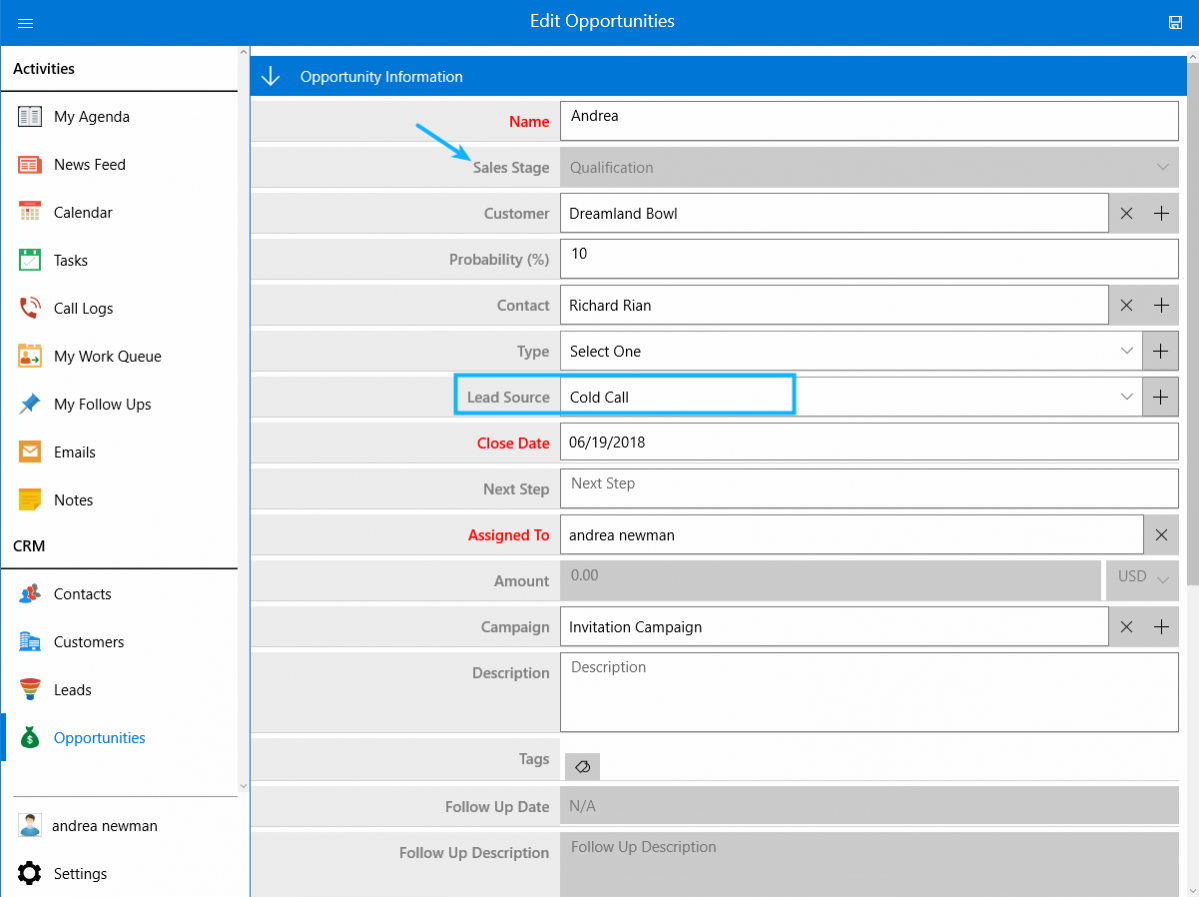
Now move on to Windows app and Whenever an Opportunity is created with Sales Stage as Qualification, you can view the Lead Source set automatically to Cold Call and the Sales Stage gets locked and you cannot edit it. It will be locked until you change the Lead Source to Campaigns and next to it.
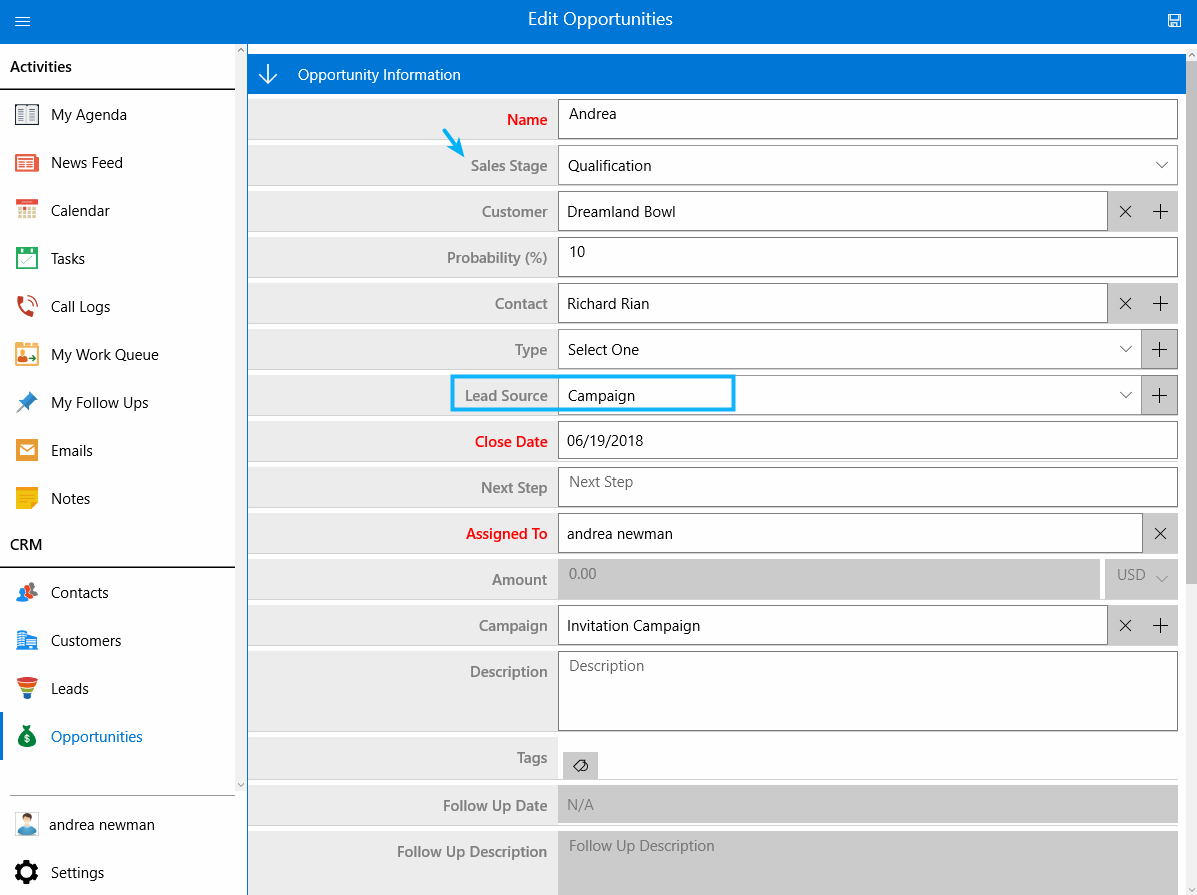
Here, Lead Source is changed to Campaigns and now you can edit the Sales Stage.
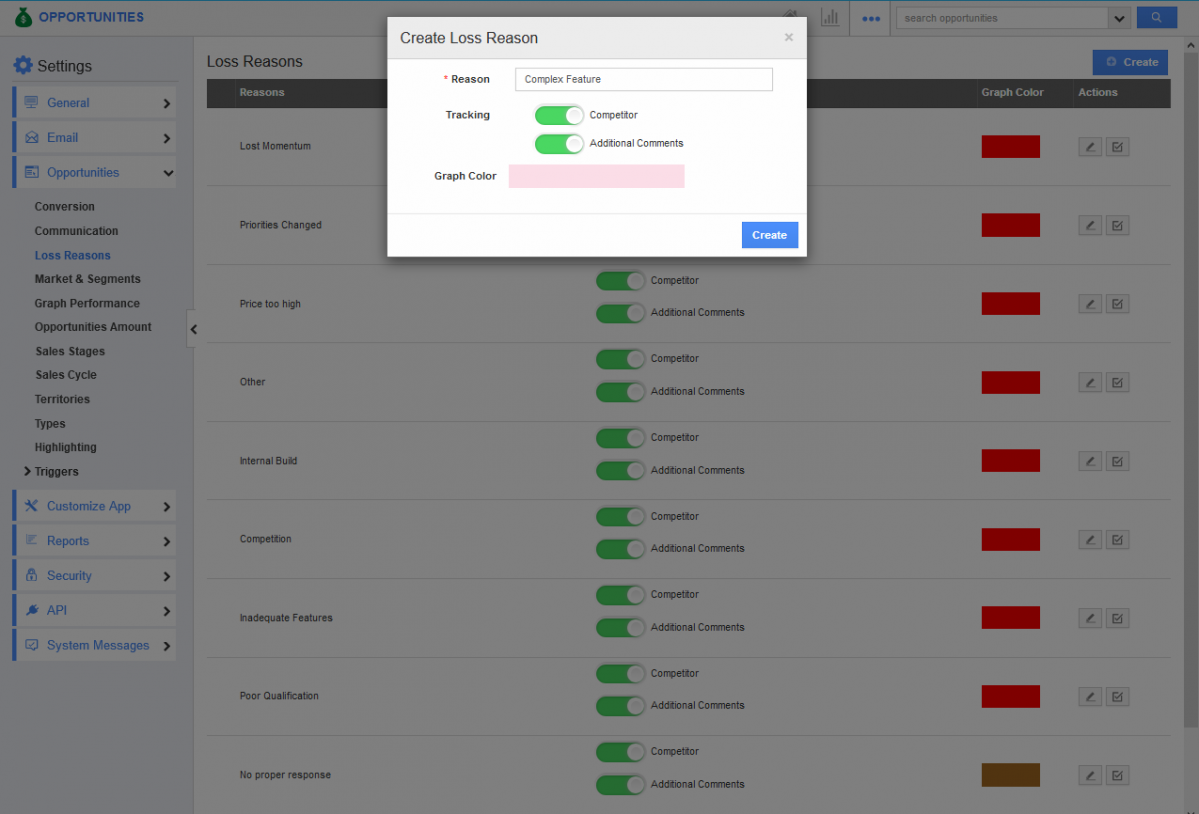
- Record the loss reason for Opportunities – We, in this release of Windows(Desktop and Mobile), have added a new feature of recording the purpose behind losing an opportunity. You can create your own loss reasons in the web by moving to Settings -> Opportunities -> Loss Reasons. Click on “Create” button to create your own loss reason. You can also view some default loss reasons.
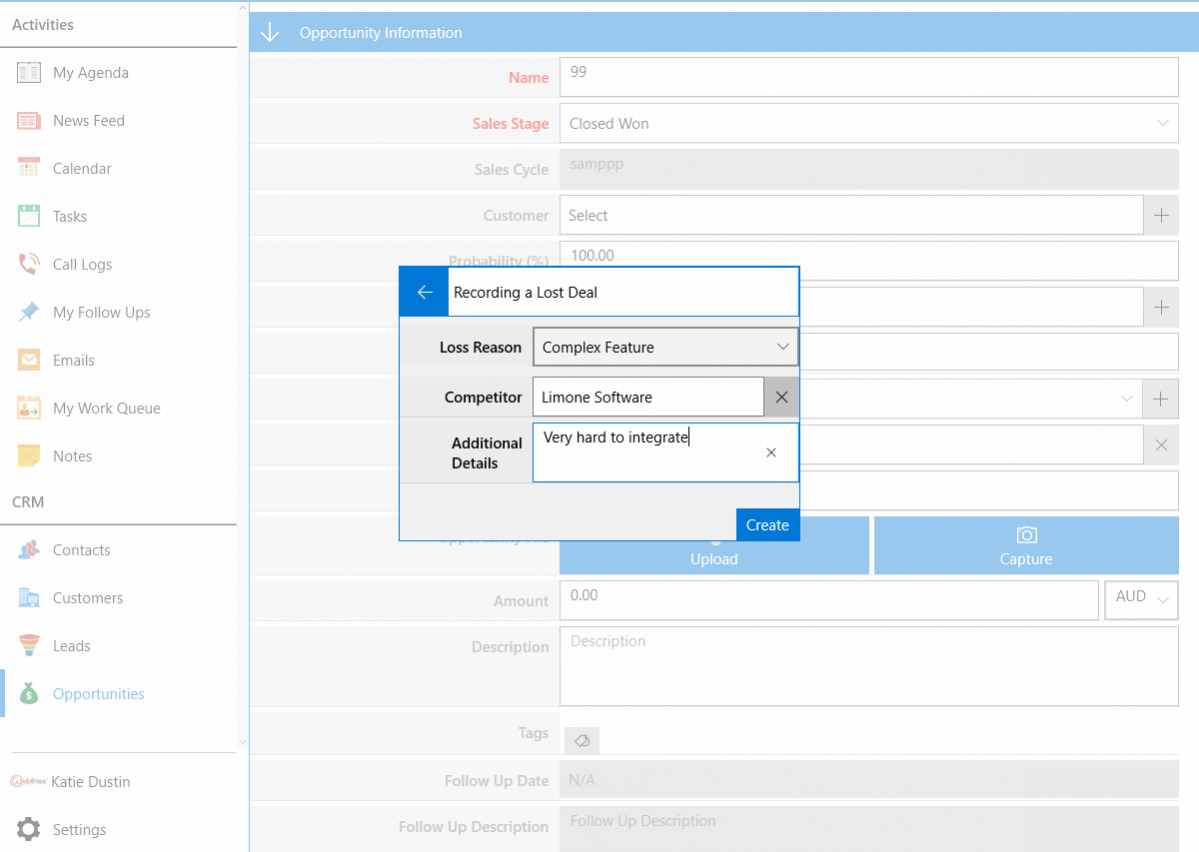
And now in windows, when an opportunity moves to “Closed Lost” sales stage, “Recording a Lost deal” pop up appears where you can select your loss reasons from the drop down and furnish with the competitor and additional details. Click on Save button helps you in recording your Opportunity’s loss reason.
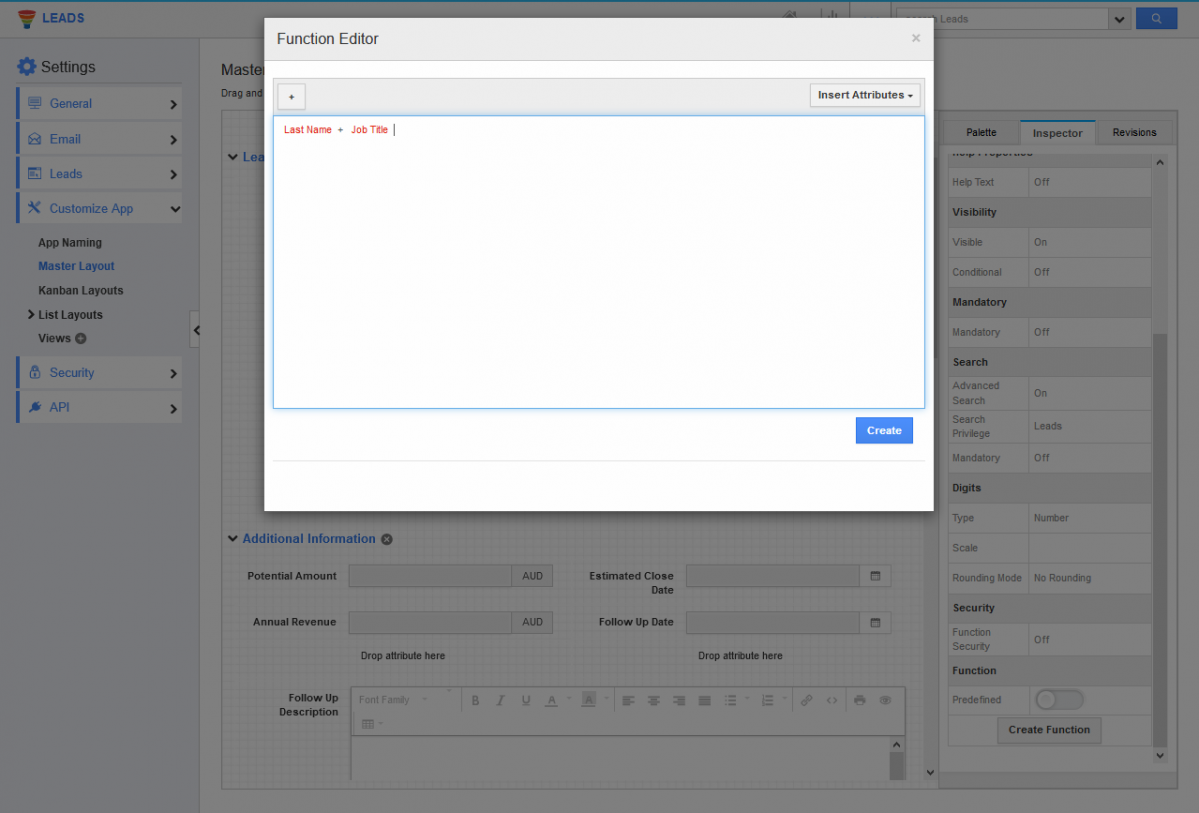
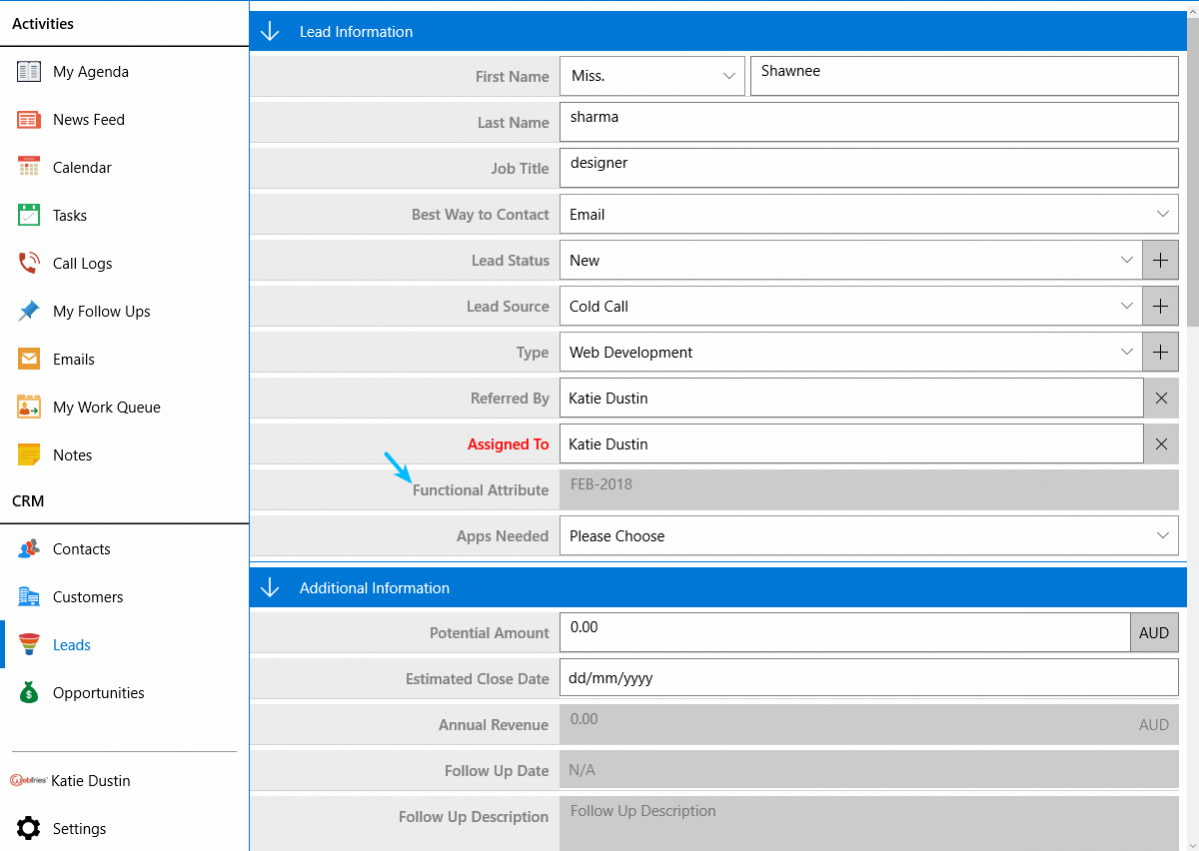
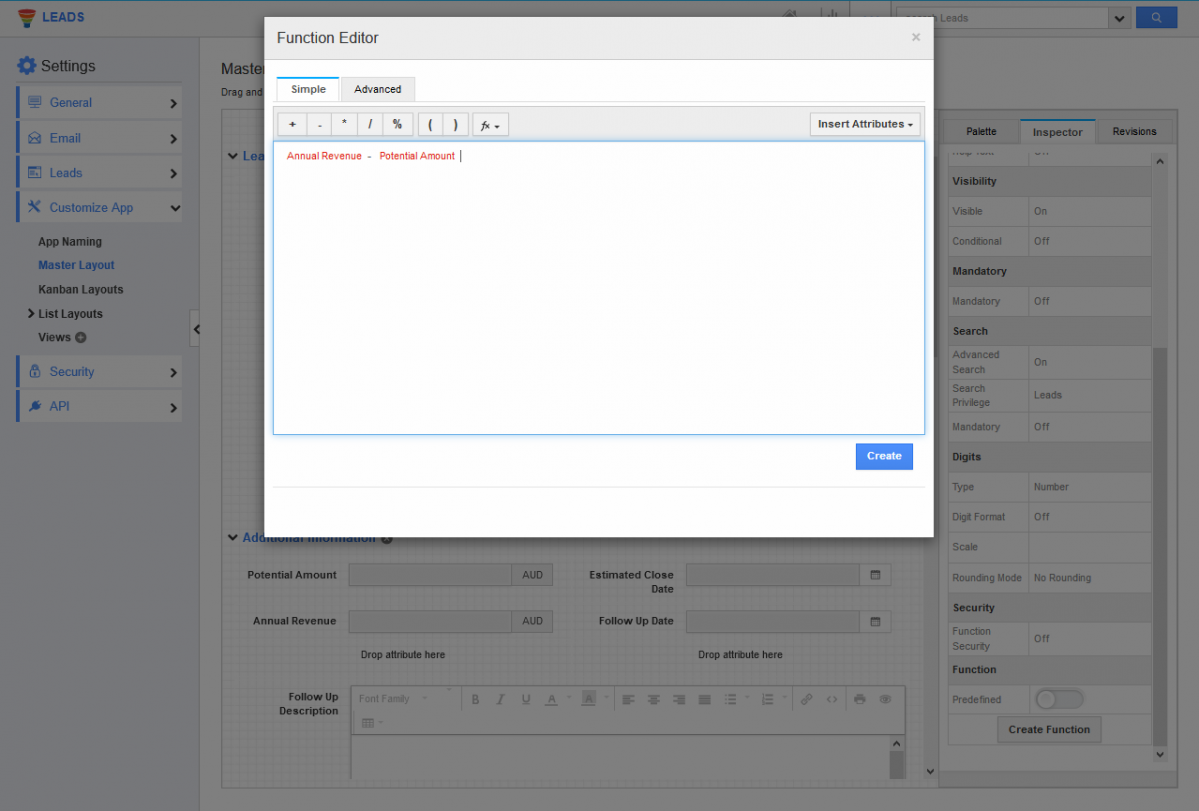
- Create Custom Calculations using Functional attributes – For the convenience of our customers, we have added “Function” attribute in Windows layout of all the CRM apps by which you can add your own custom formulas. It includes String Formula, Numeric Formula or Date Formula.
- Added Created On and Modified On in the Advanced Search – In this release, we have enhanced the “Advanced Search” feature in the Contacts App. That is you would now be able to scan or search for the particular Contact using “Created on” and “Modified on” fields.
Move on to Show All page. Click on More -> Advanced Search option and you will be opened with a “Advanced Search” page. You can view “Created on” and “Modified on” field.
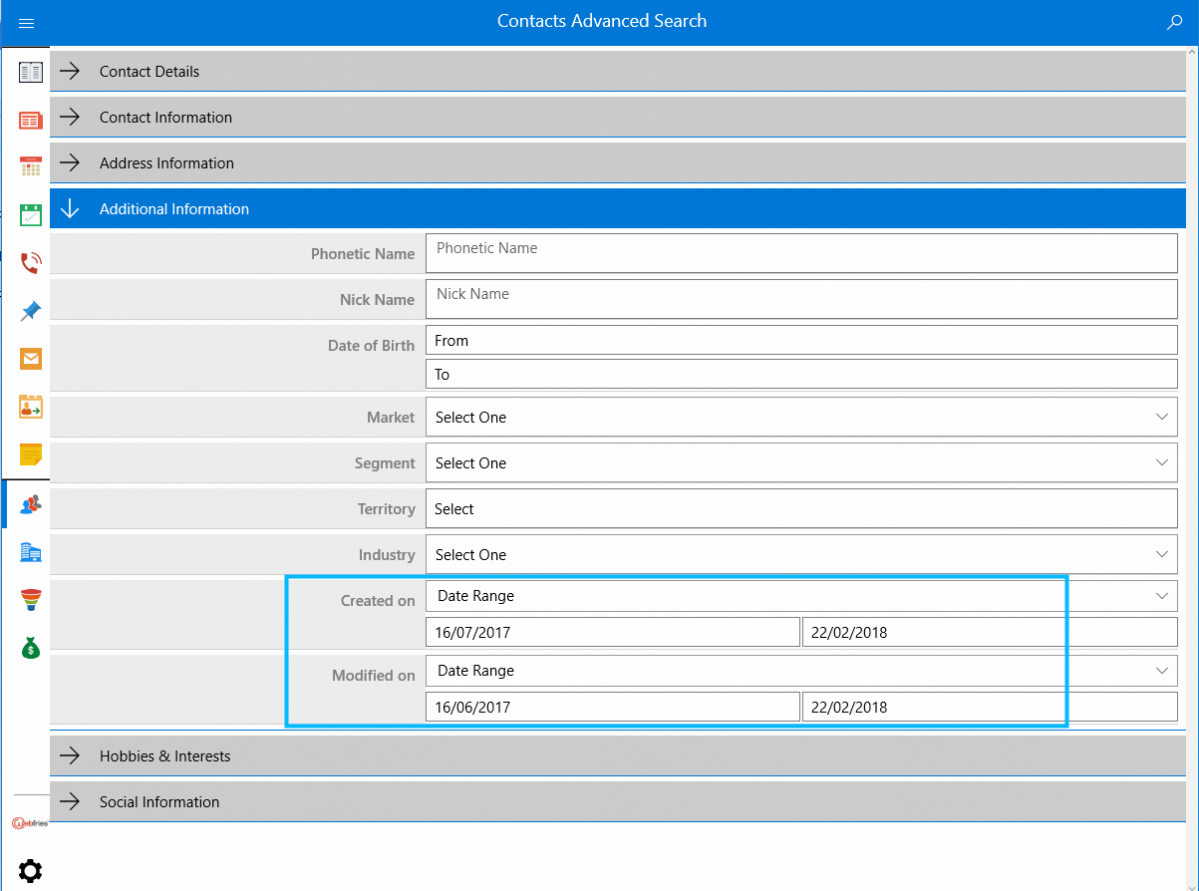
Now, there are two options using which you can search the Contacts,
Date Range – Exact date can be specified.
Last – Can search for contacts within specific duration like Hours, Days, Weeks, Months and Years.
The Result will be displayed as,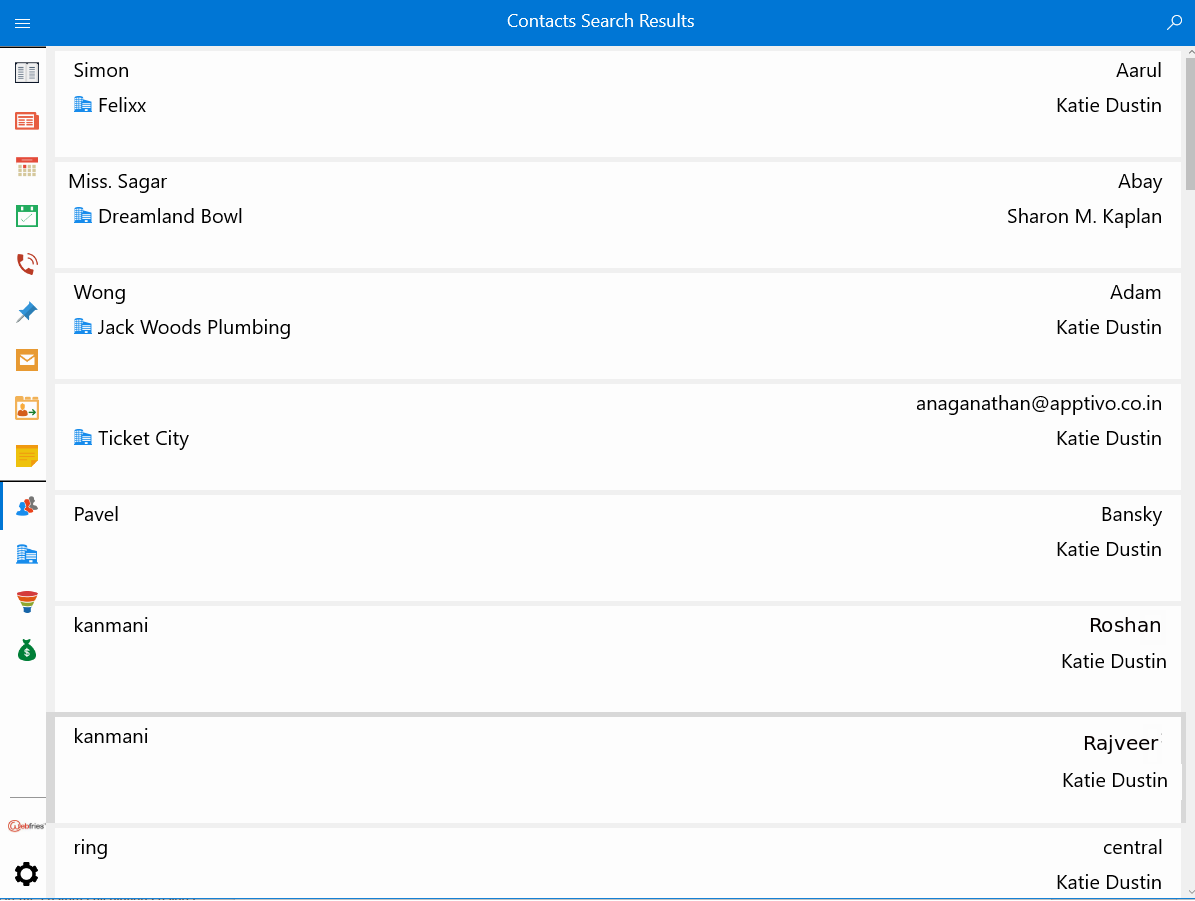
 |
 |
 |
 |
 |
You can customize the Function attribute from the Web settings which gets reflected in Windows. For instance: Let’s consider Leads App and select String Formula. By string you can concatenate two or more fields. (Last Name + Job Title).
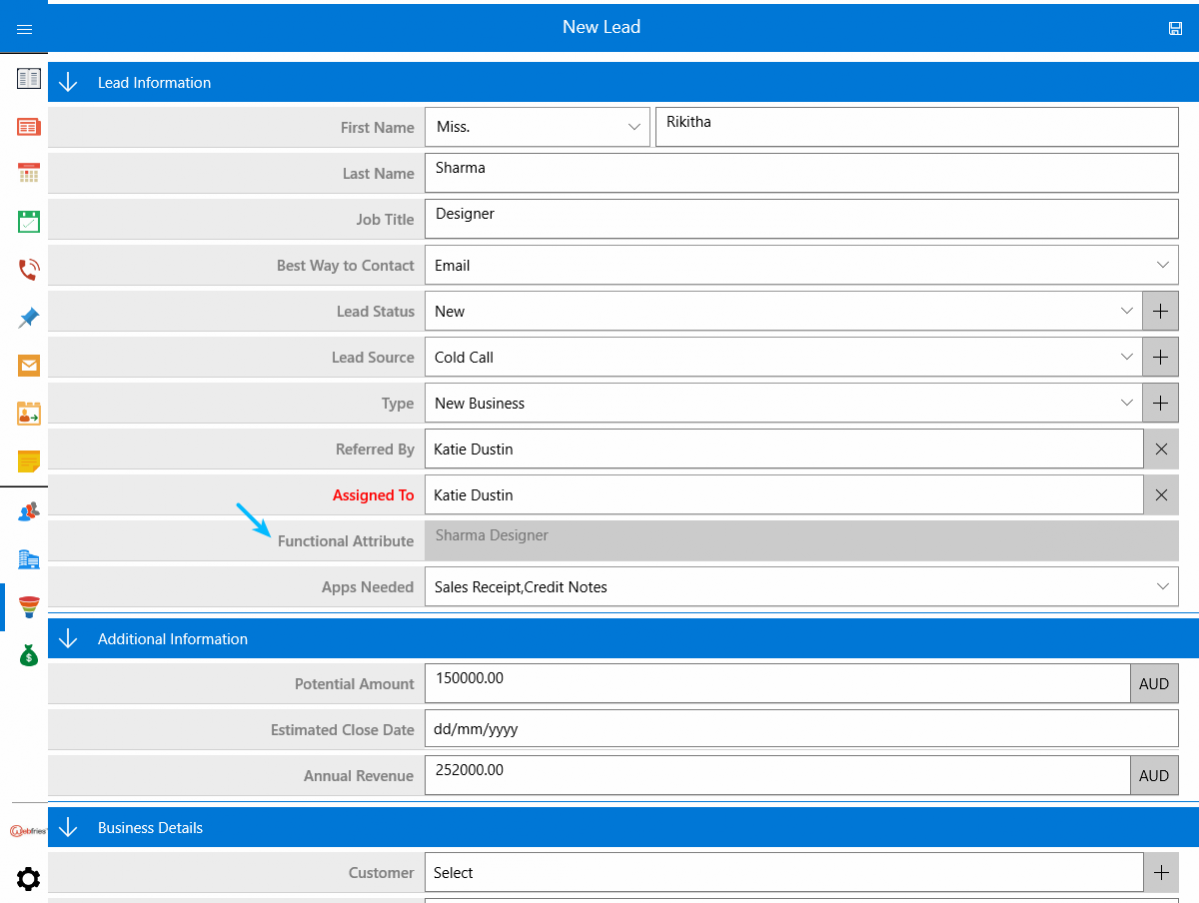 |
Now, in Windows, you can create new Lead and you can view the function concatenated automatically.
Similarly, on selecting Date Formula, it fetches you the Financial Year, Quarter and Month. Here we selected Financial Month(Created On)
 |
The result in Windows will be displayed as,
 |
And on selecting Numeric Formula, you can calculate the number attributes using provided following functions.
 |
In Windows, the result will be
 |
Latest Blogs

Apptivo's Integration with Amazon SES for Outgoing Email Server
Amazon Simple Email Service (SES) is an email platform that provides an easy, cost-effective way to send and receive email using your email addresses and domains. Apptivo has migrated its email service to Amazon SES (Simple Email Service) to enhance the performance and reliability of our email services
Read more →
EXPLORING MULTI CHANNEL CUSTOMER SUPPORT SOFTWARE
1.What is customer service software? 2
Read more →
Maximize your business performance with seamless CRM Integration
1.What is CRM Integration? 2
Read more →
